Getting Started with Goose Desktop
Configure Collate's MCP Server to interact with block's AI agent Goose.
Prerequisites
For this guide, you will need:
- nvm and npx/node version 22
- Collate v1.8.0 or later- You can upgrade your version of Collate with this guide
- Goose Desktop
- Collate MCP Application and Personal Access Token
Adding your Collate MCP Server to Goose Desktop
This how-to guide uses Goose Desktop for macOS. Make sure that you already have an LLM Provider configured before prompting.
- Navigate to Goose Desktop's Settings, then under Extensions, select +Add custom extension.
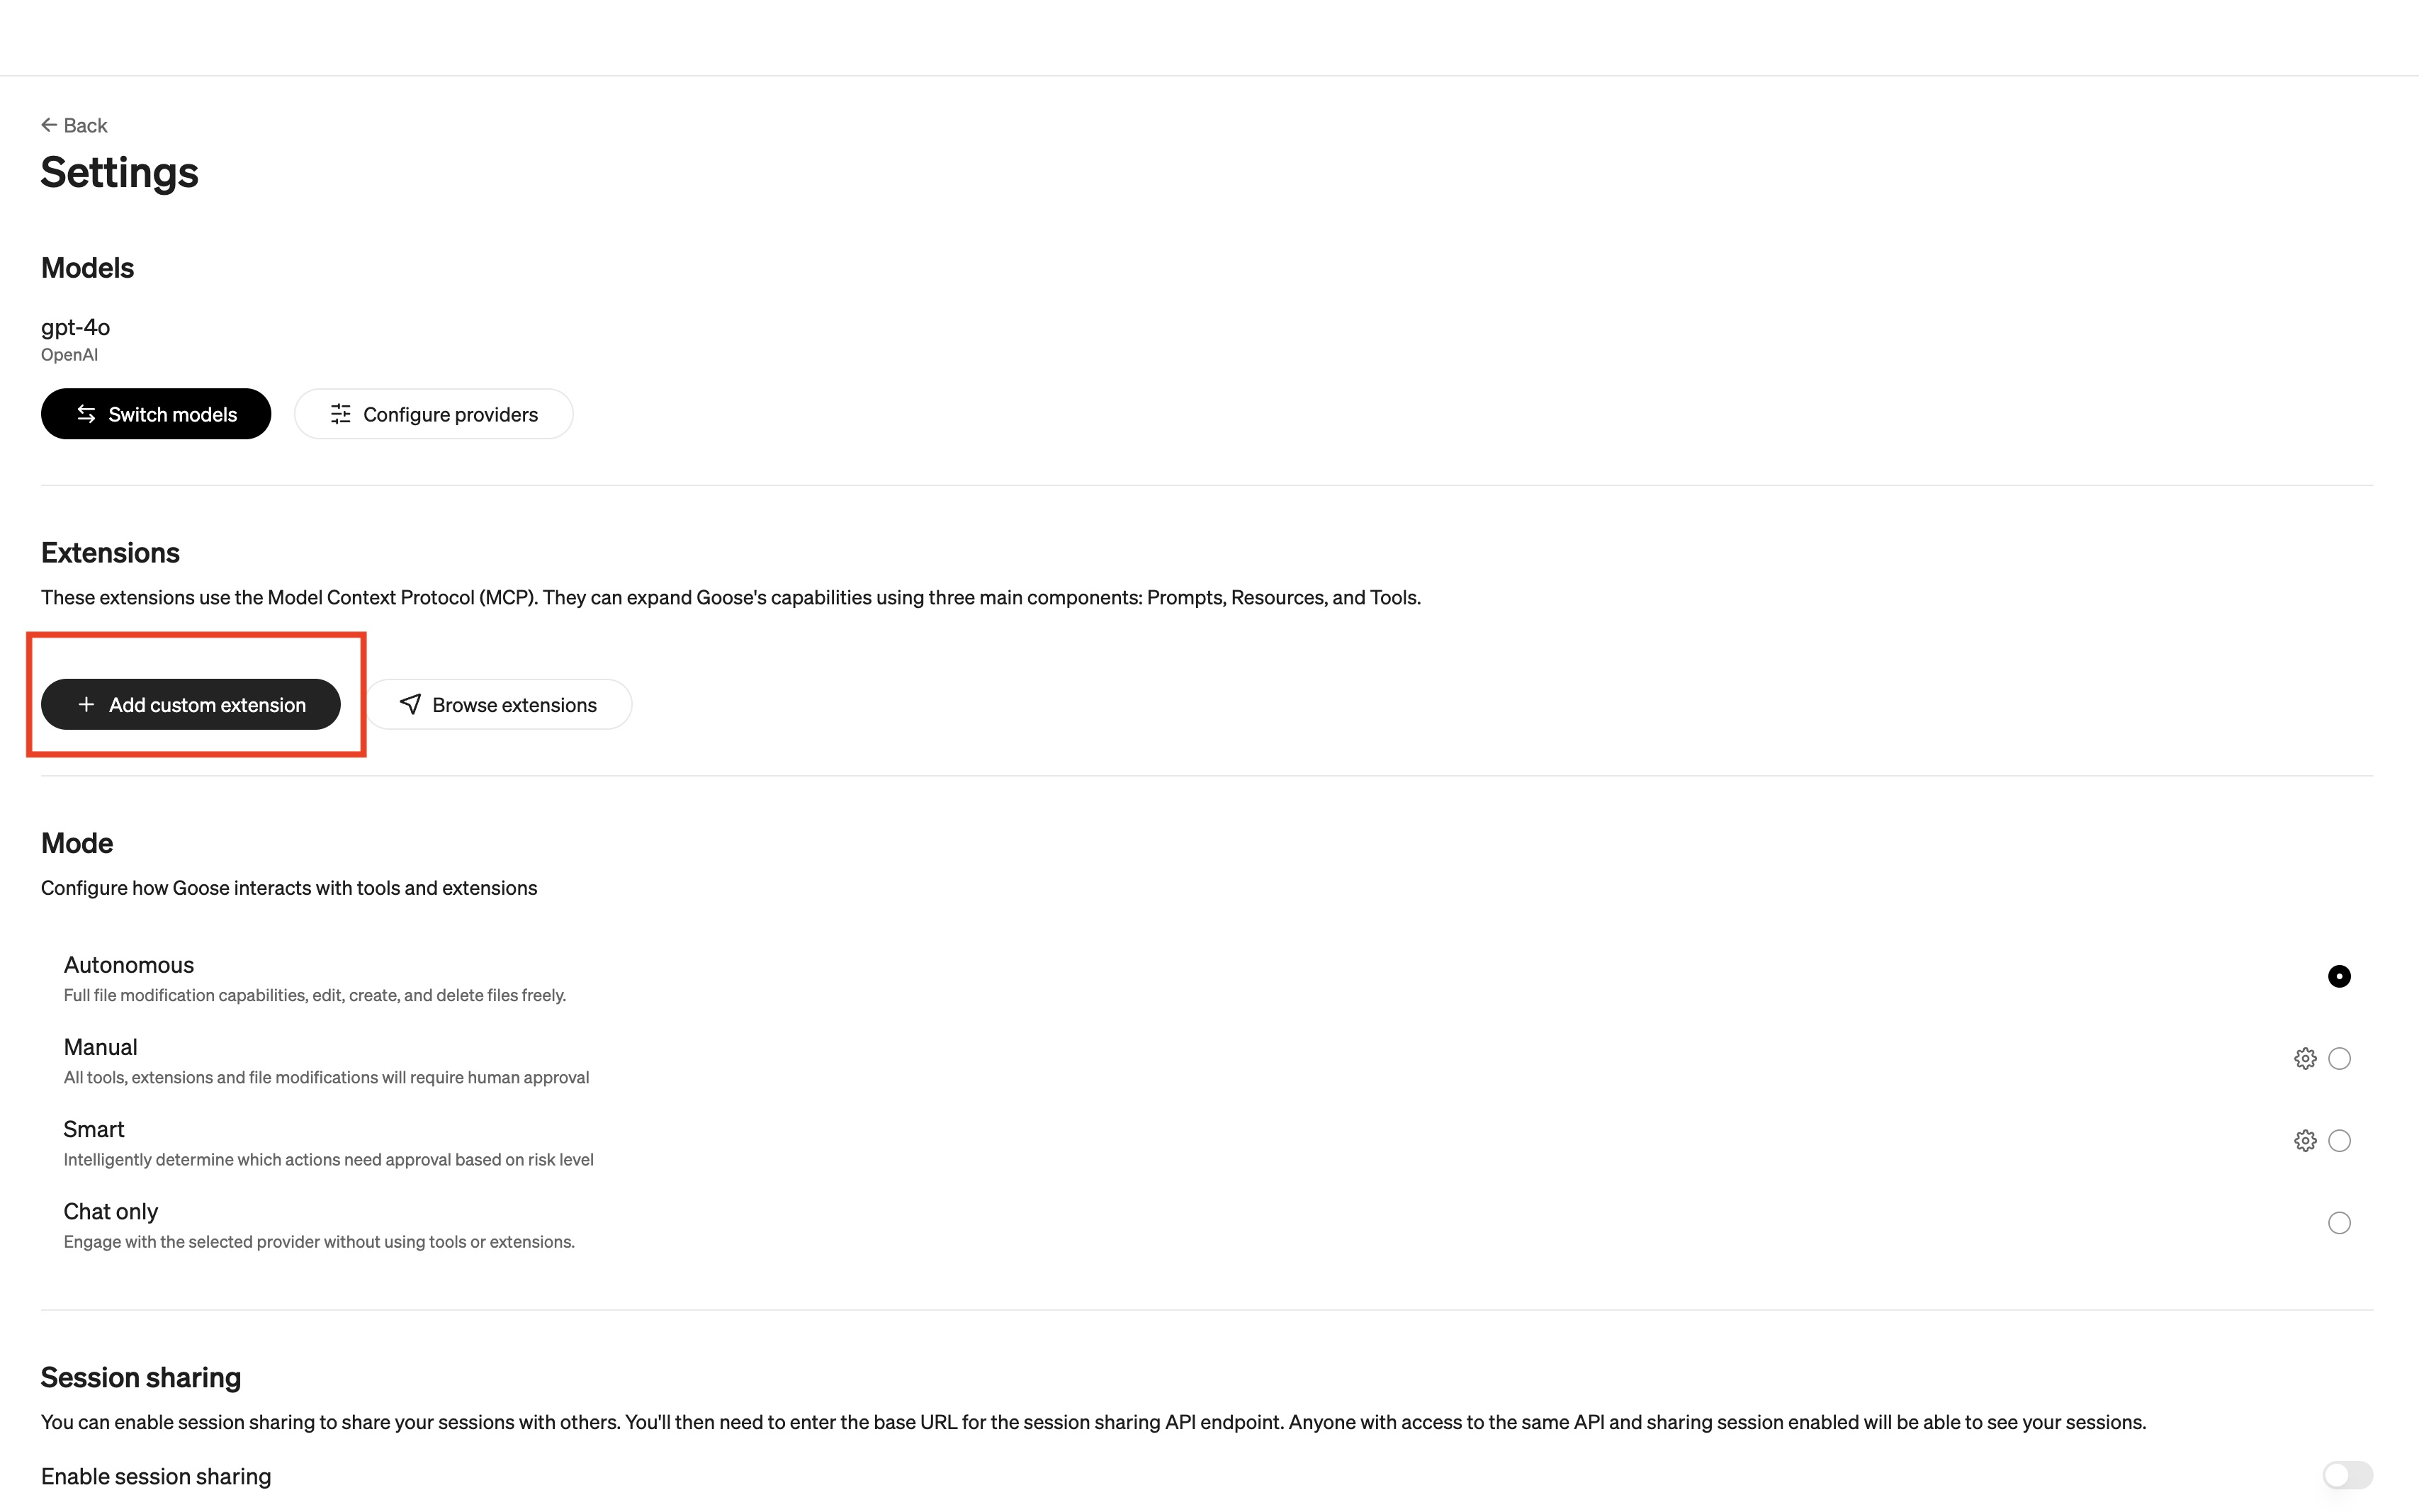
Settings are where you add custom extensions like Collate MCP Server
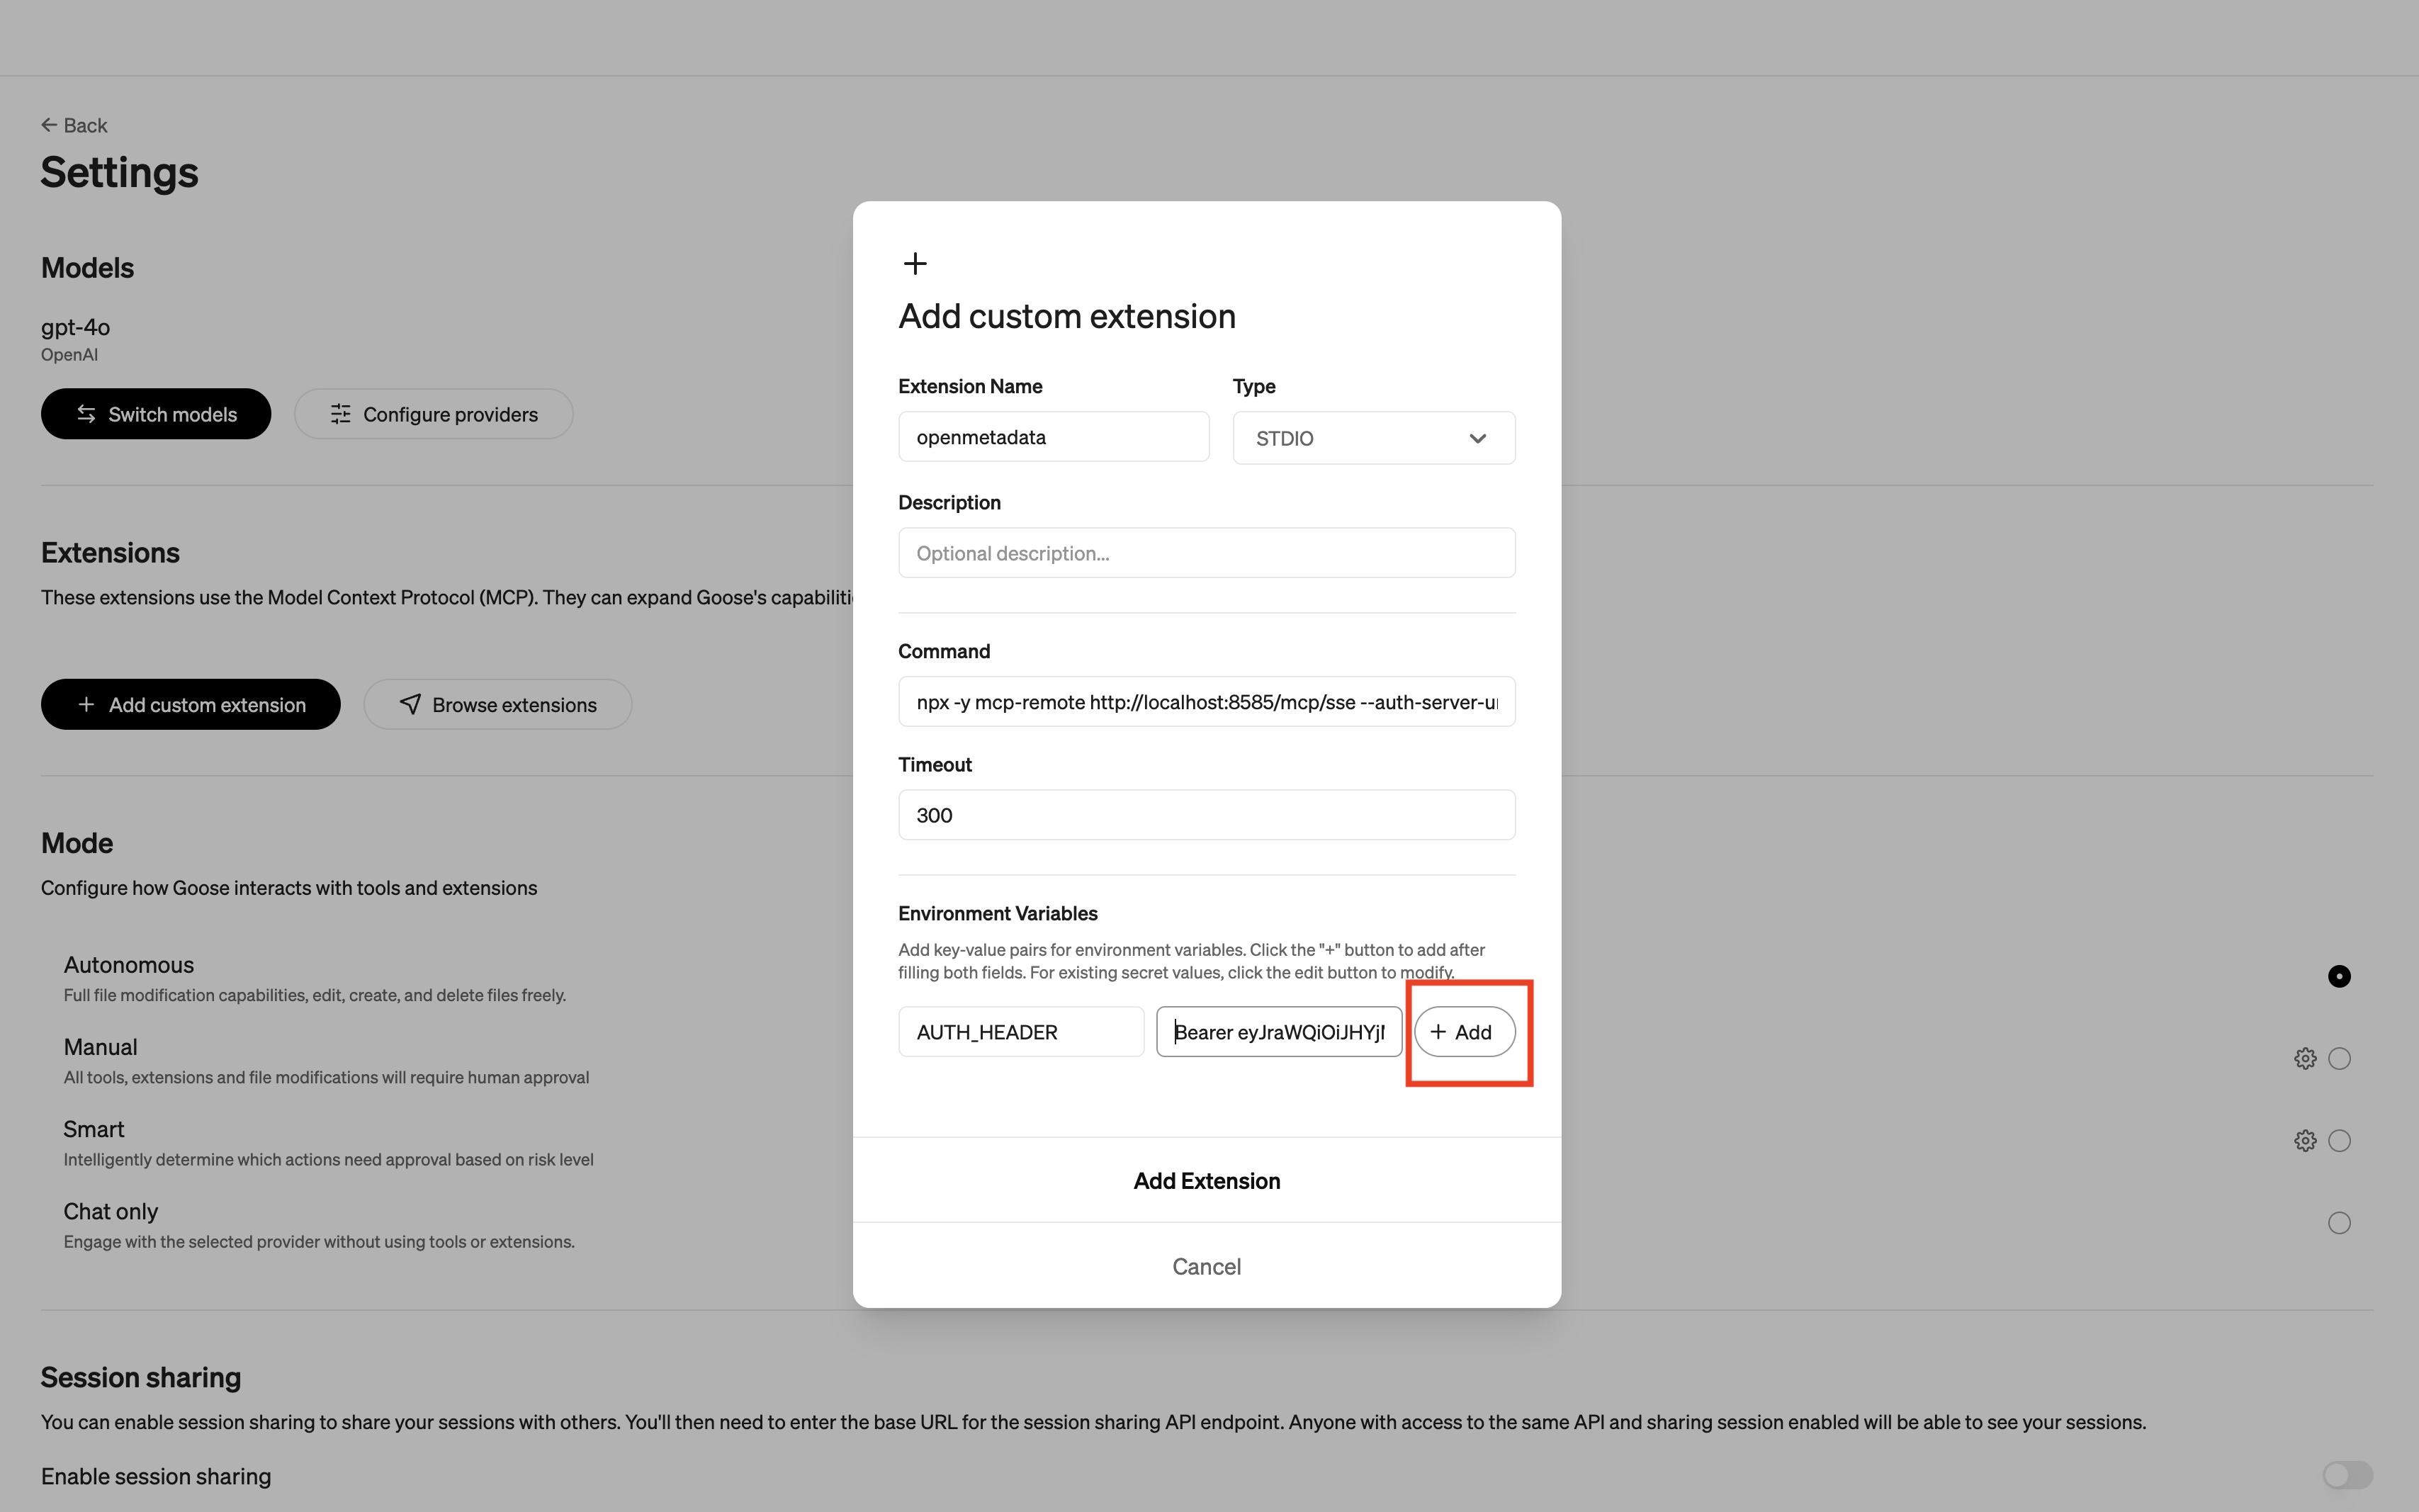
- The custom extension should have the following information:
- Extension Name
Collate - Command paste the following command:
- If you are running it locally, your command will look like this:
- Add 1 Environment Variable
- Variable name is
AUTH_HEADER - Value is "Bearer <YOUR_OpenMetadata_PAT>
- Variable name is
- Extension Name
The proper settings for Collate MCP Server in Goose
- Select +Add to store this Environment Variable
The proper settings for Collate MCP Server in Goose
- Select Add Extension
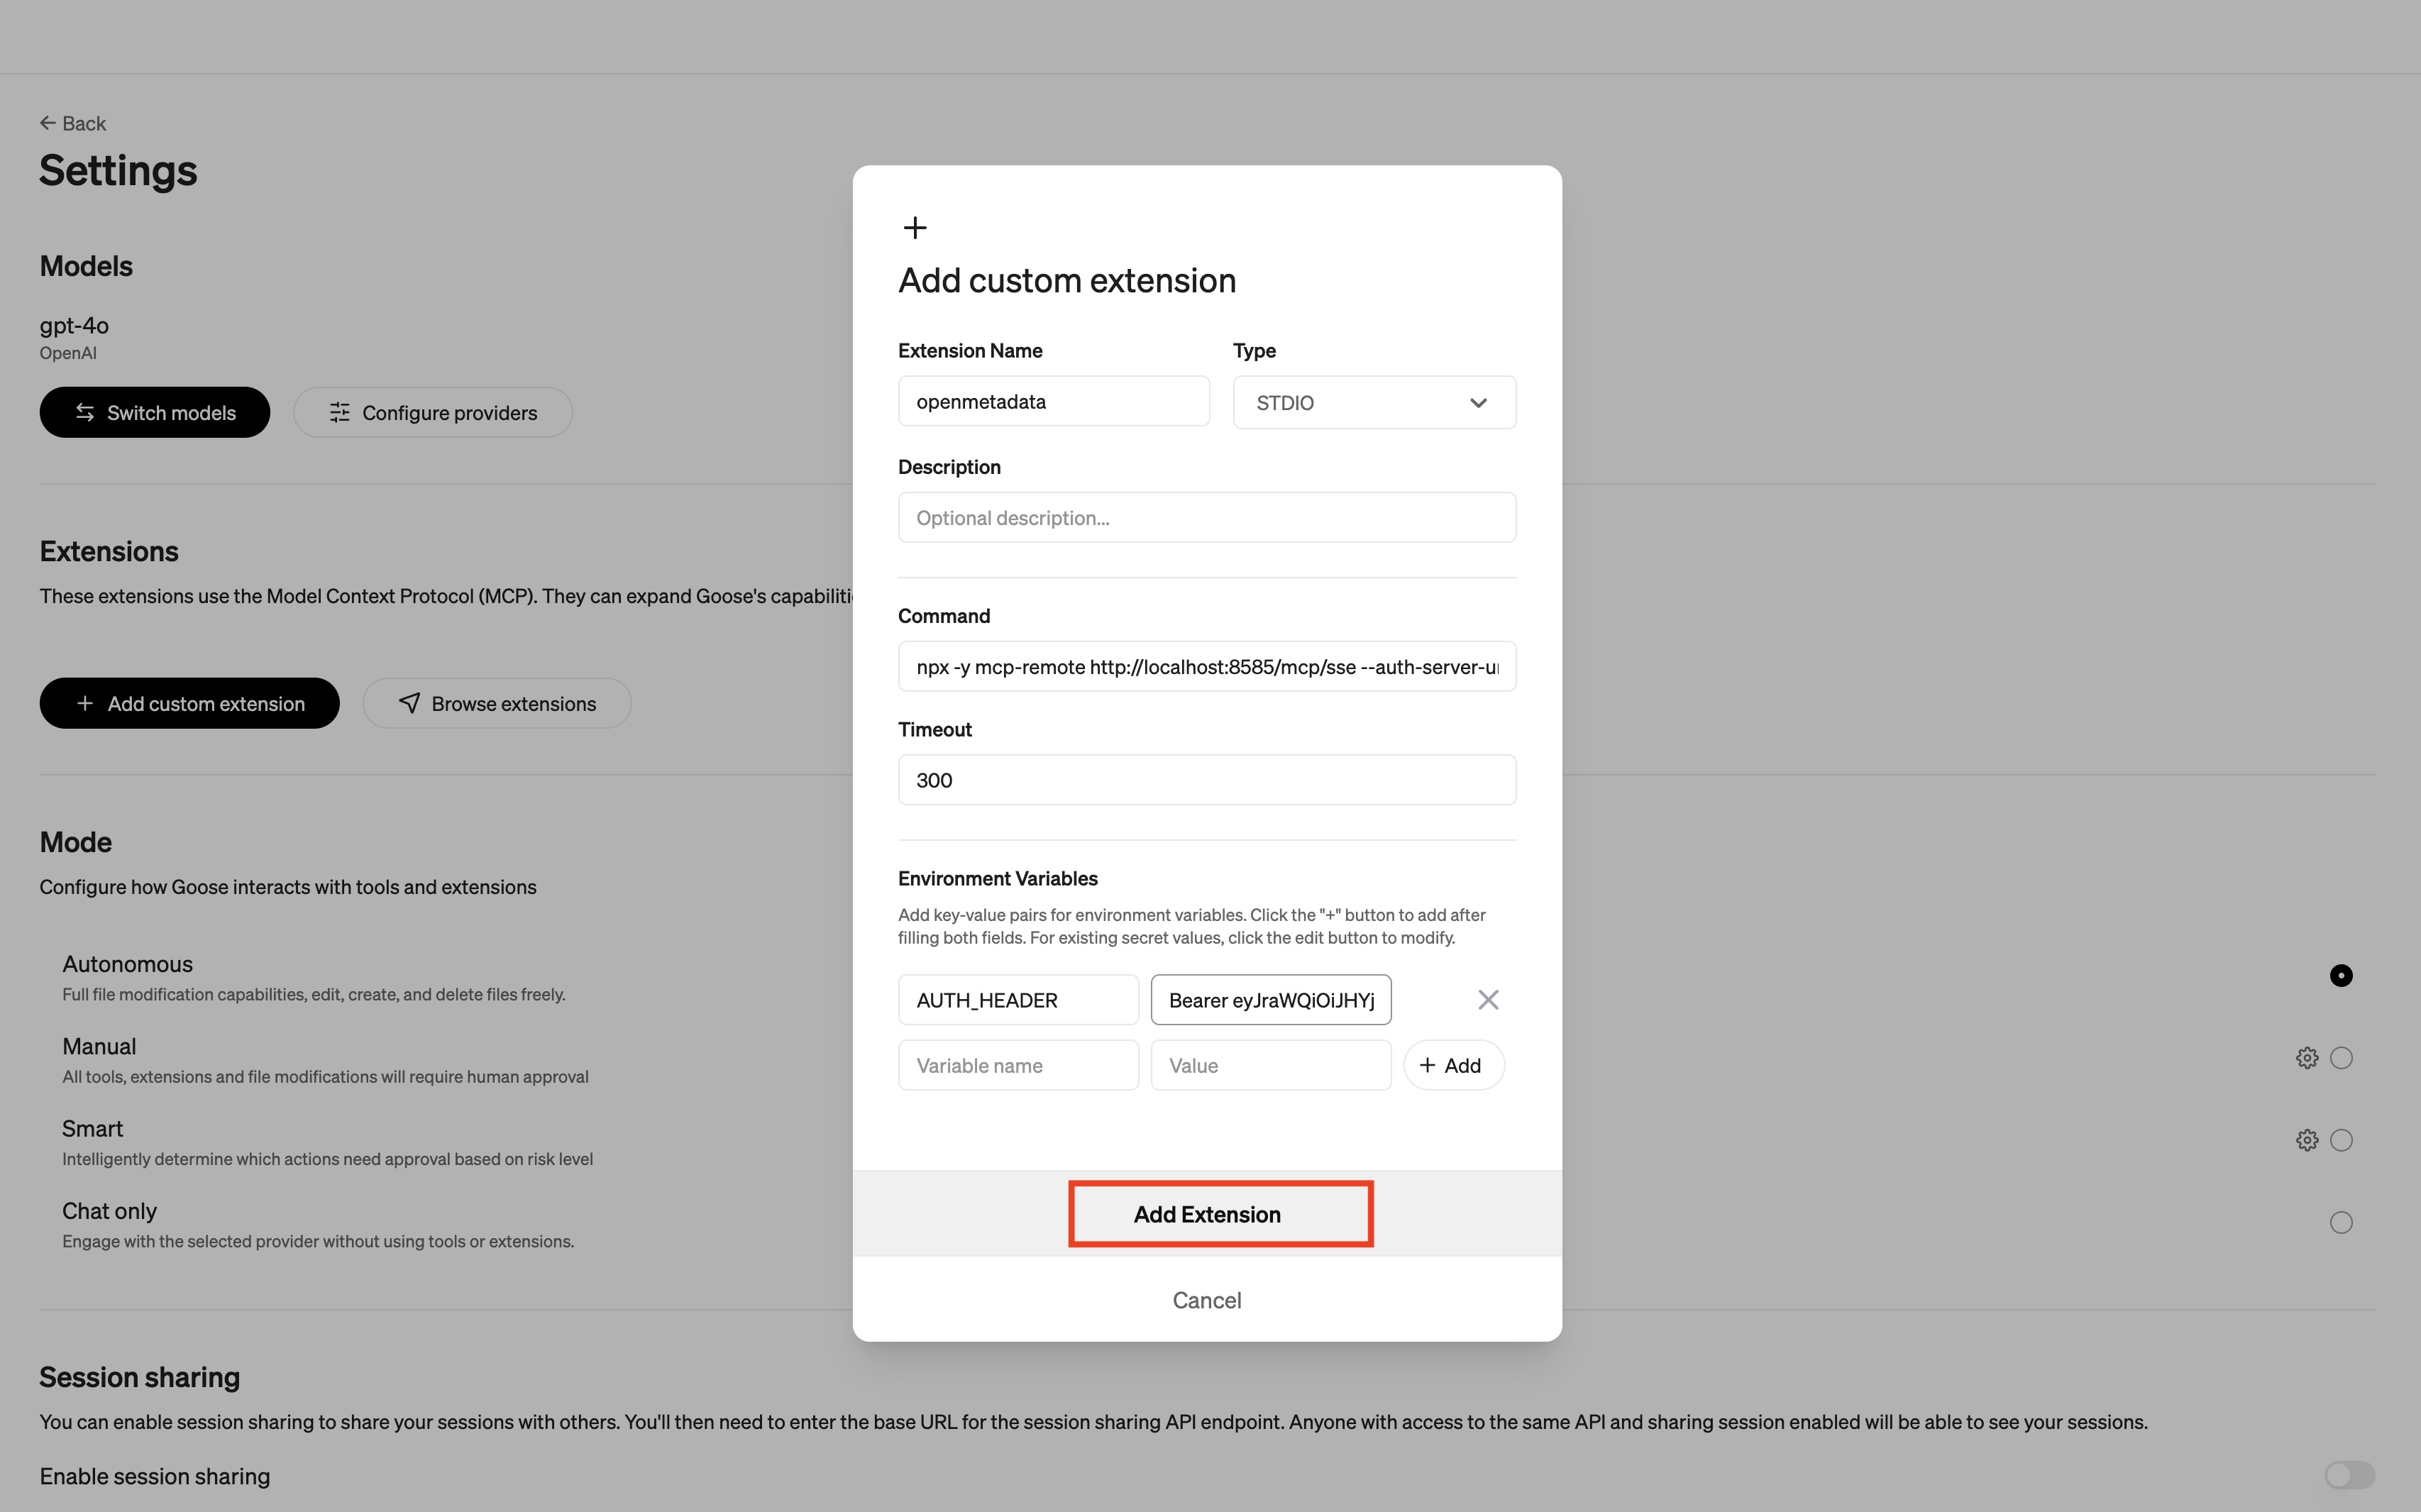
Adding Collate MCP Server as a custom extension to Goose
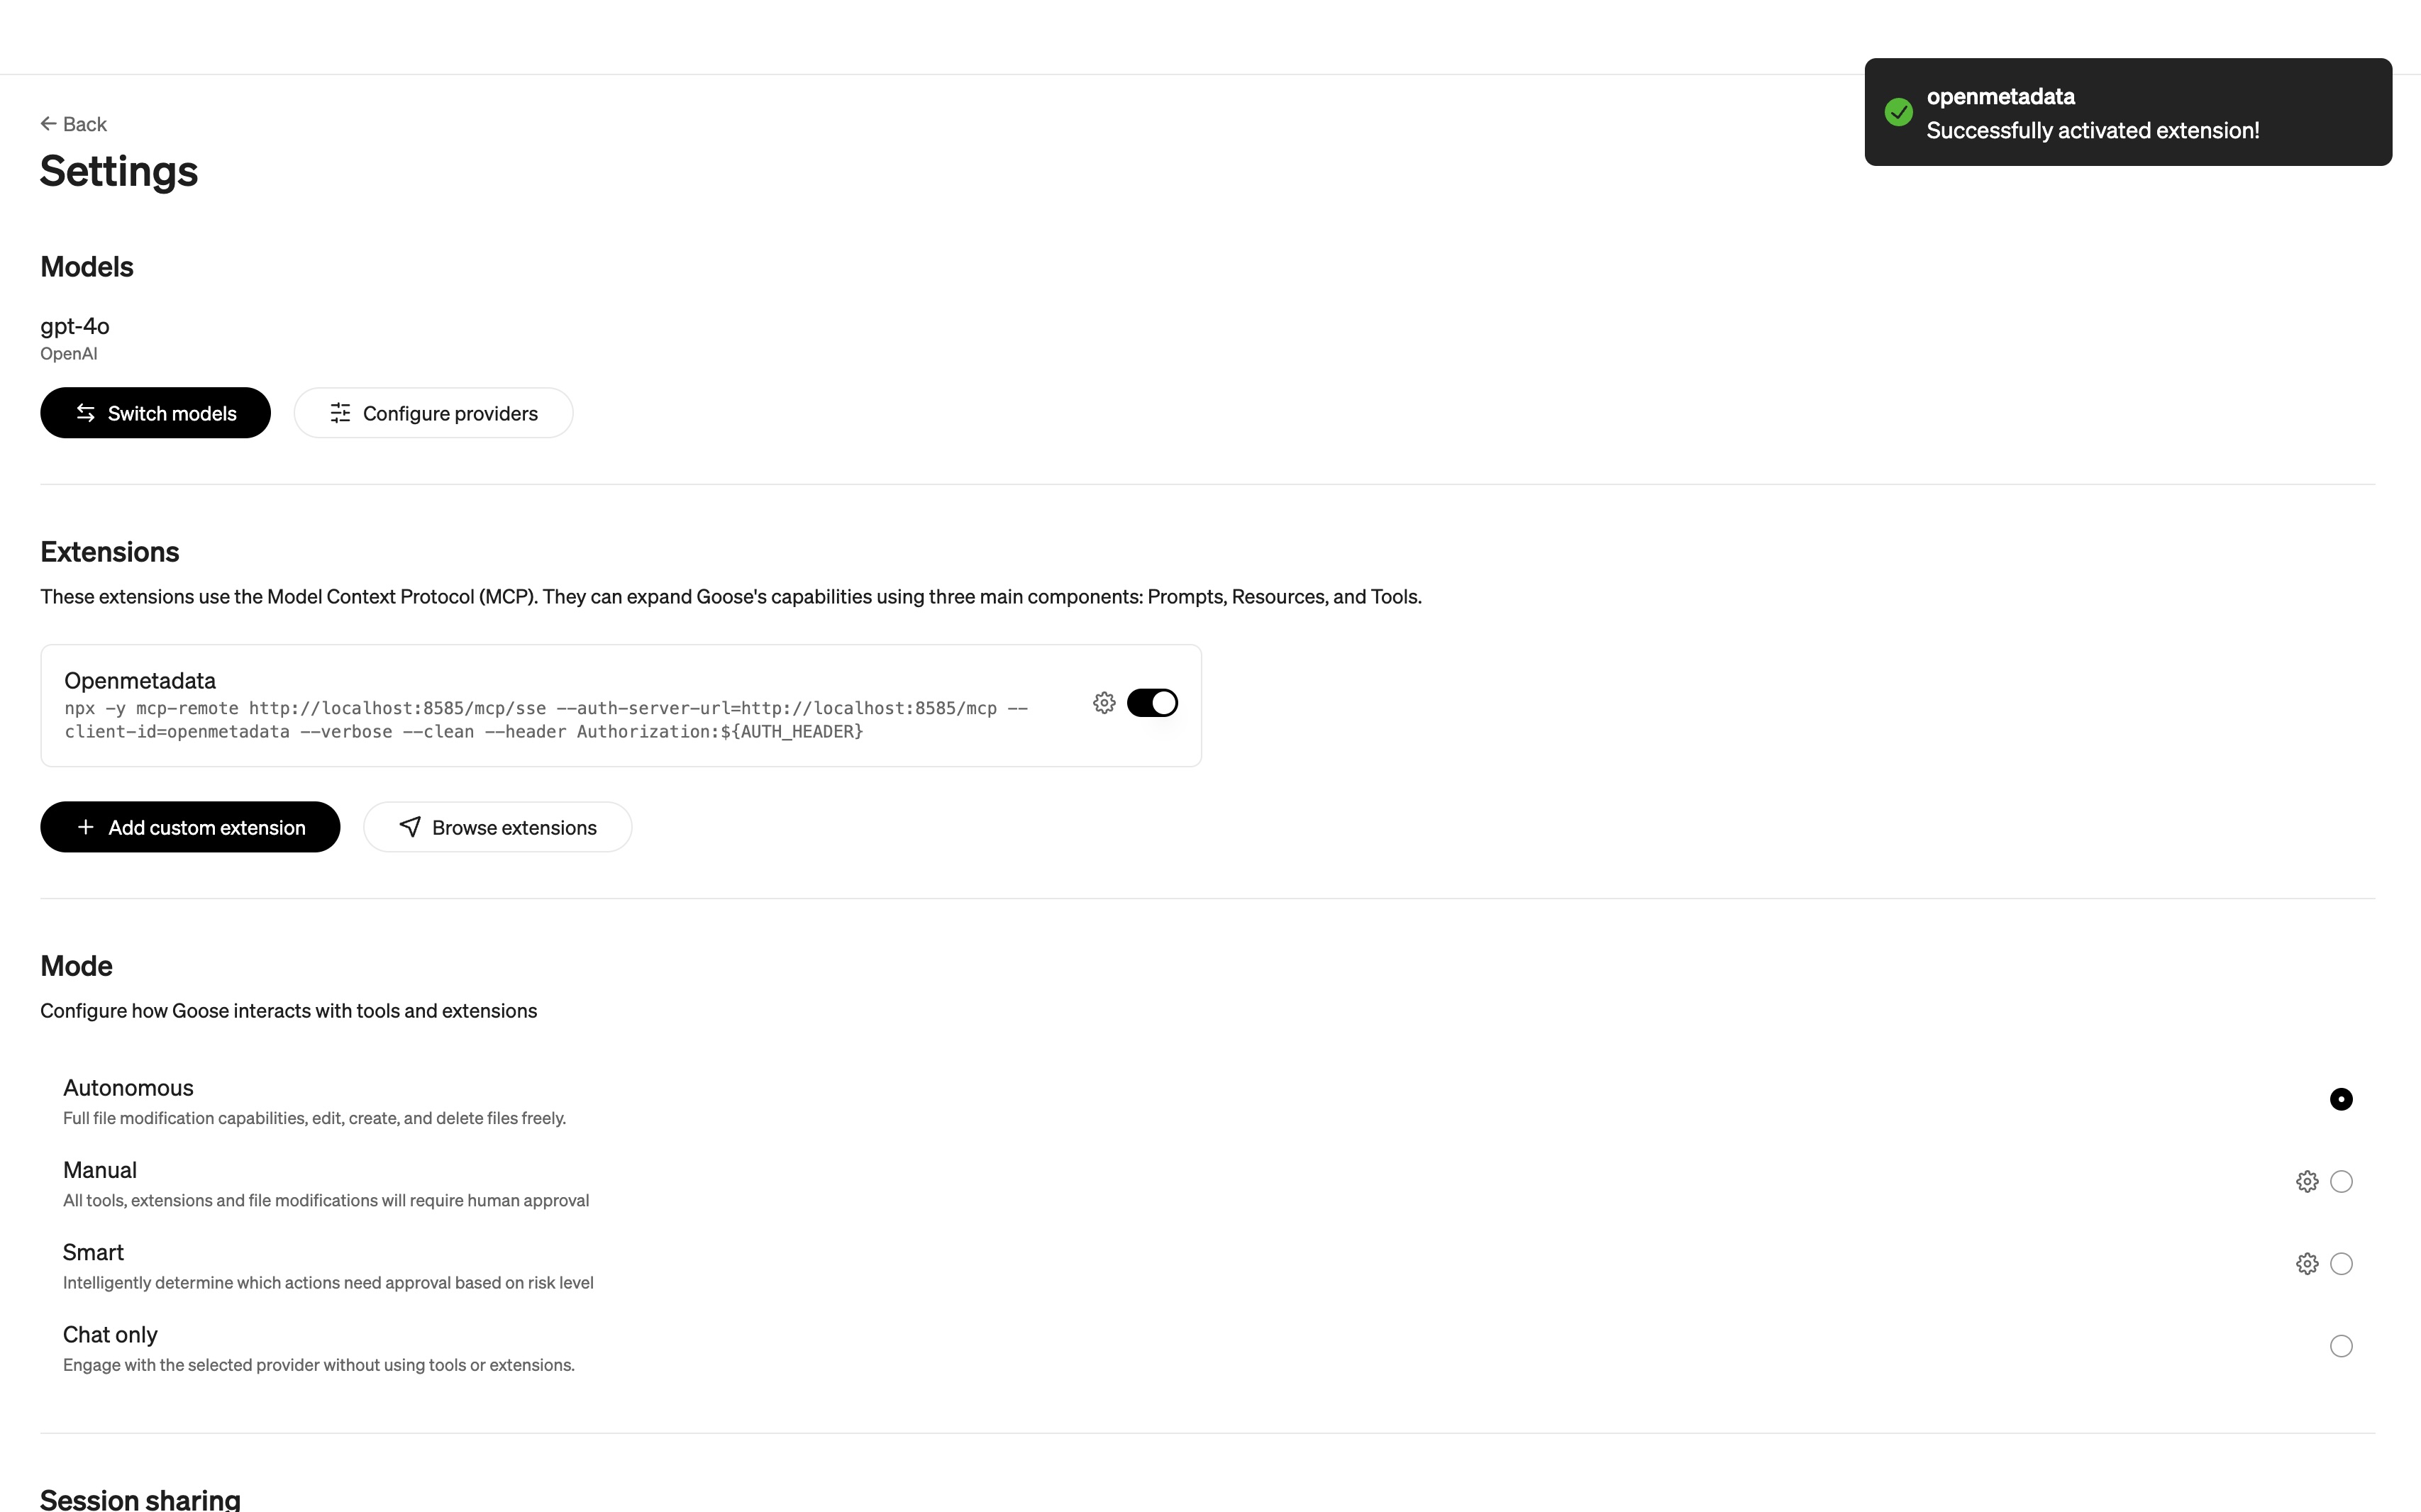
Collate successfully added to Goose
Prompt to read from Collate
This part of the guide assumes that you have assets in Collate. You can add data assets into Collate here.
Select a model from Goose and paste the following prompt to have it read from Collate:
For more sample use cases with MCP please check out our blog!
Reach out on Slack!
With MCP, we are finding new ways to use Collate all the time! Now that you have Claude and Collate configured to work together, think you've got a great new use case? Show us what you've got in Slack!