How to Ingest Metadata
This section deals with integrating third-party sources with OpenMetadata and running the workflows from the UI.
OpenMetadata gives you the flexibility to bring in your data from third-party sources using CLI, or the UI. Let’s start with ingesting your metadata from various sources through the UI. Follow the easy steps to add a connector to fetch metadata on a regular basis at your desired frequency.
Note: Ensure that you have Admin access in the source tools to be able to add a connector and ingest metadata.
Admin users can connect to multiple data sources like Databases, Dashboards, Pipelines, ML Models, Messaging, Storage, as well as Metadata services.
Connector DocumentationRefer to the Docs to ingest metadata from multiple sources - Databases, Dashboards, Pipelines, ML Models, Messaging, Storage, as well as Metadata services.
Database Services: ADLS Datalake, Athena, AzureSQL, BigQuery, Clickhouse, Databricks, DB2, DeltaLake, Domo Database, Druid, DynamoDB, GCS Datalake, Glue, Hive, Impala, MariaDB, MongoDB, MSSQL, MySQL, Oracle, PinotDB, PostgreSQL, Presto, Redshift, Salesforce, SAP HANA, SAS, SingleStore, Snowflake, SQLite, S3 Datalake, Trino, and Vertica.
Dashboard Services: Domo Dashboard, Looker, Metabase, Mode, PowerBI, Qlik Sense, QuickSight, Redash, Superset, and Tableau.
Pipeline Services: Airbyte, Airflow, Dagster, Databricks Pipeline, Domo Pipeline, Fivetran, Glue Pipeline, NiFi, and Spline.
Storage Service: Amazon S3
Let’s start with an example of fetching metadata from a database service, i.e., Snowflake.
- Start by creating a service connection by clicking on Settings from the left nav bar. Navigate to the Services section, and click on Databases. Click on Add New Service.
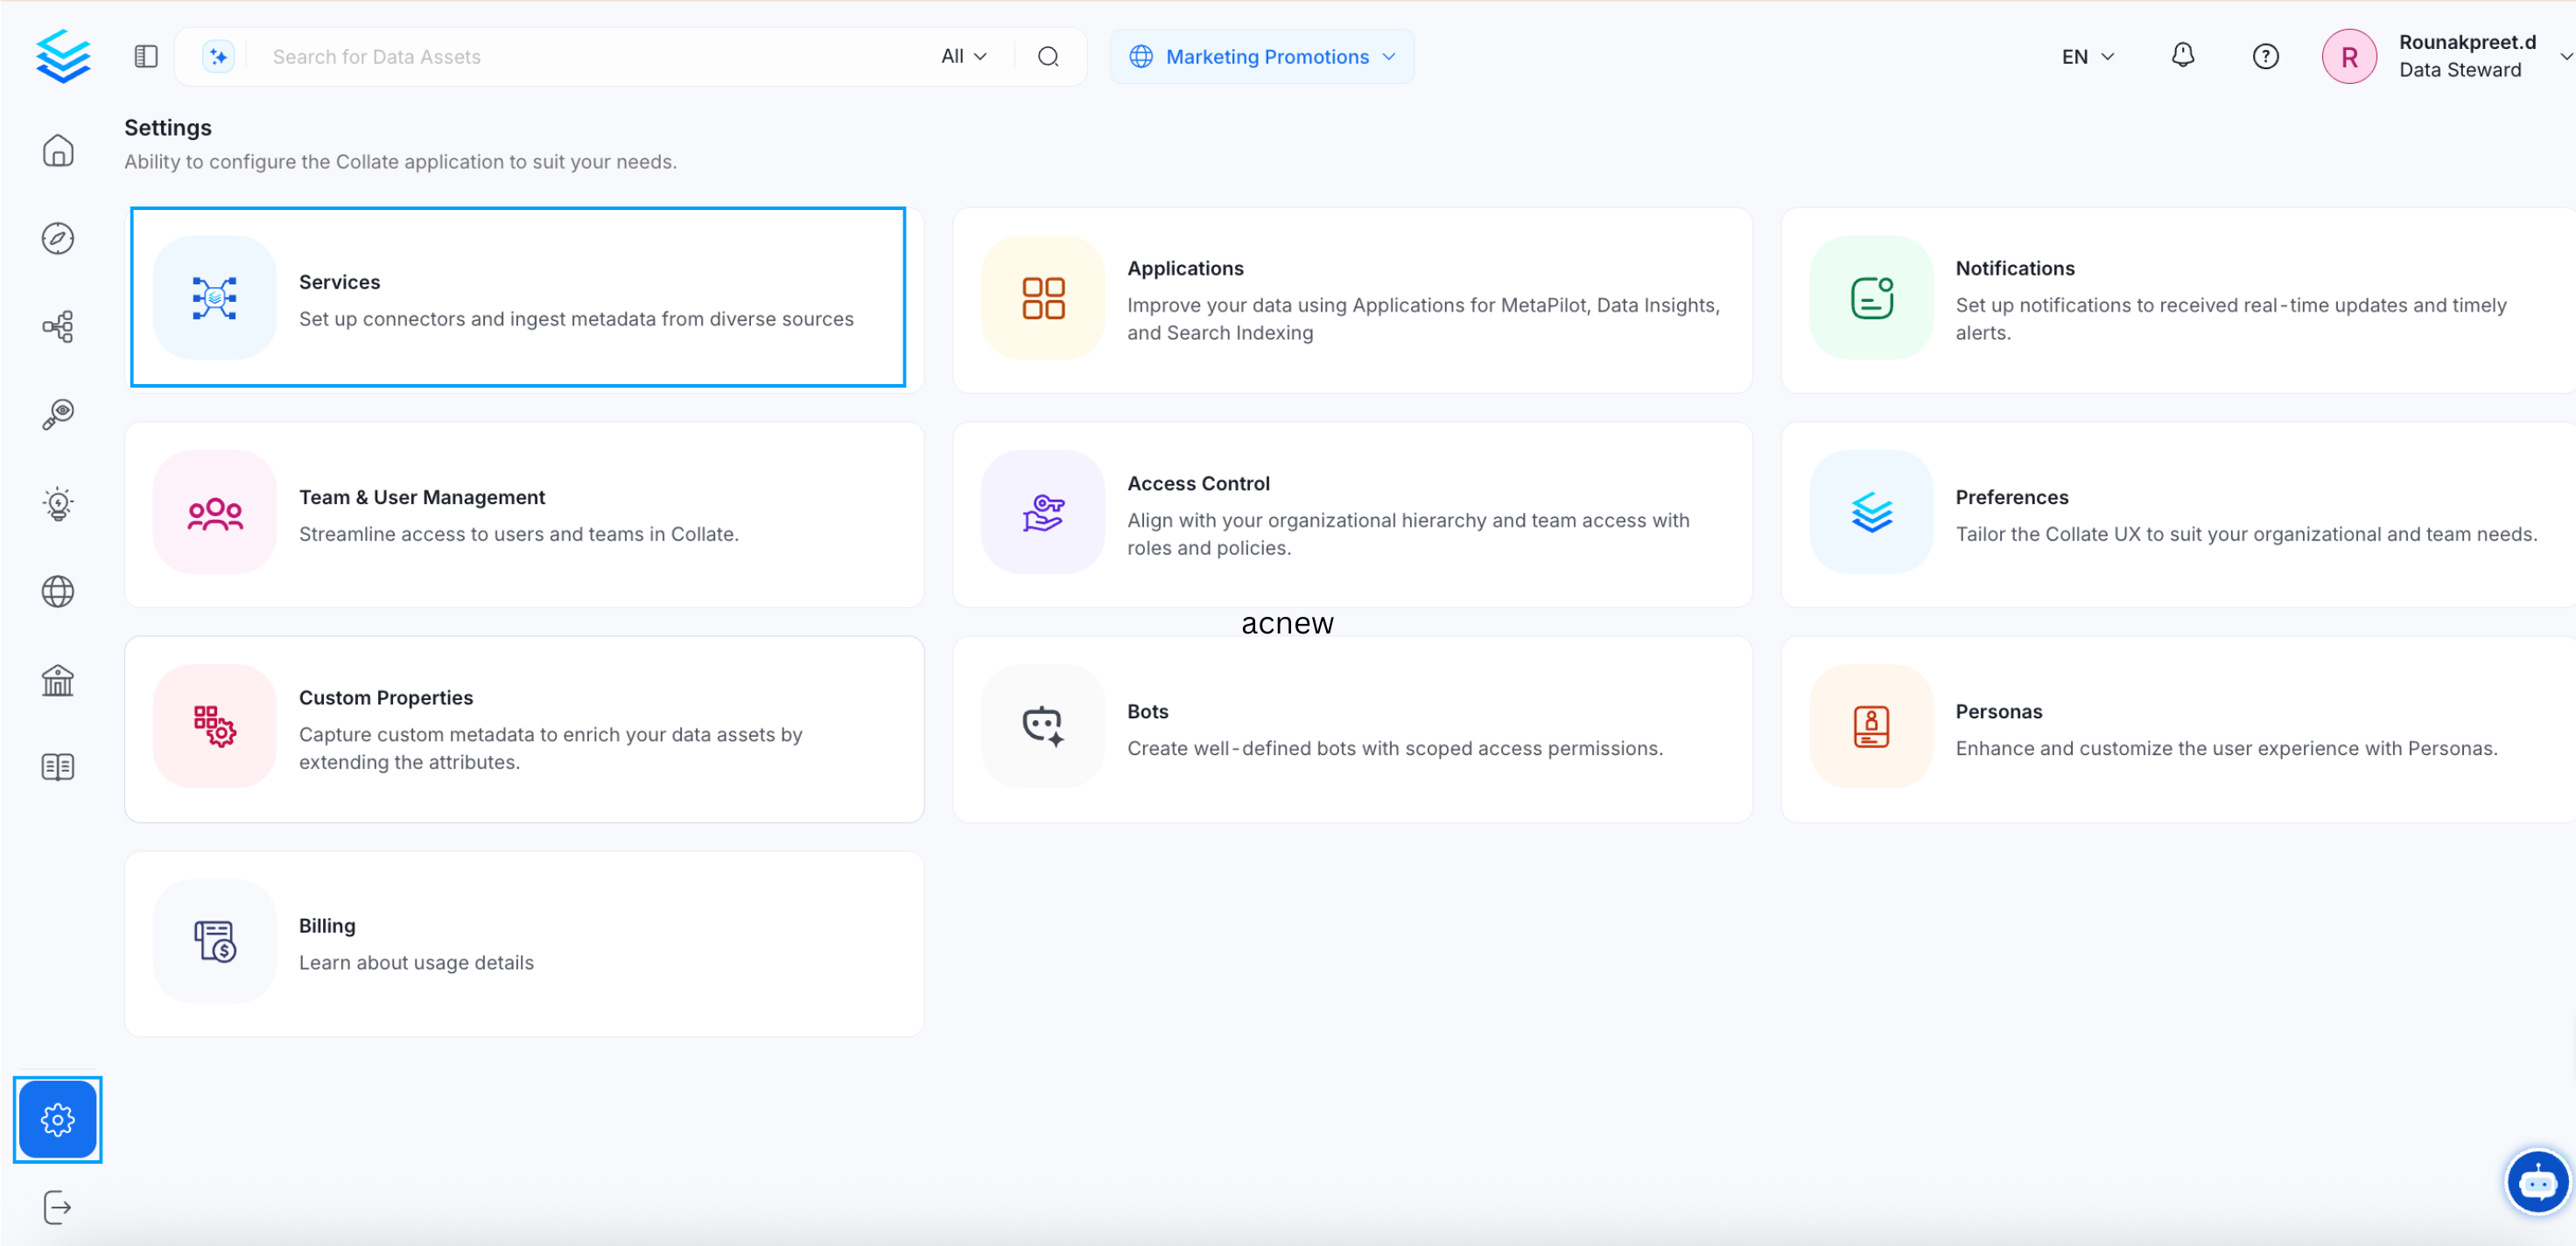
Create a Service Connection
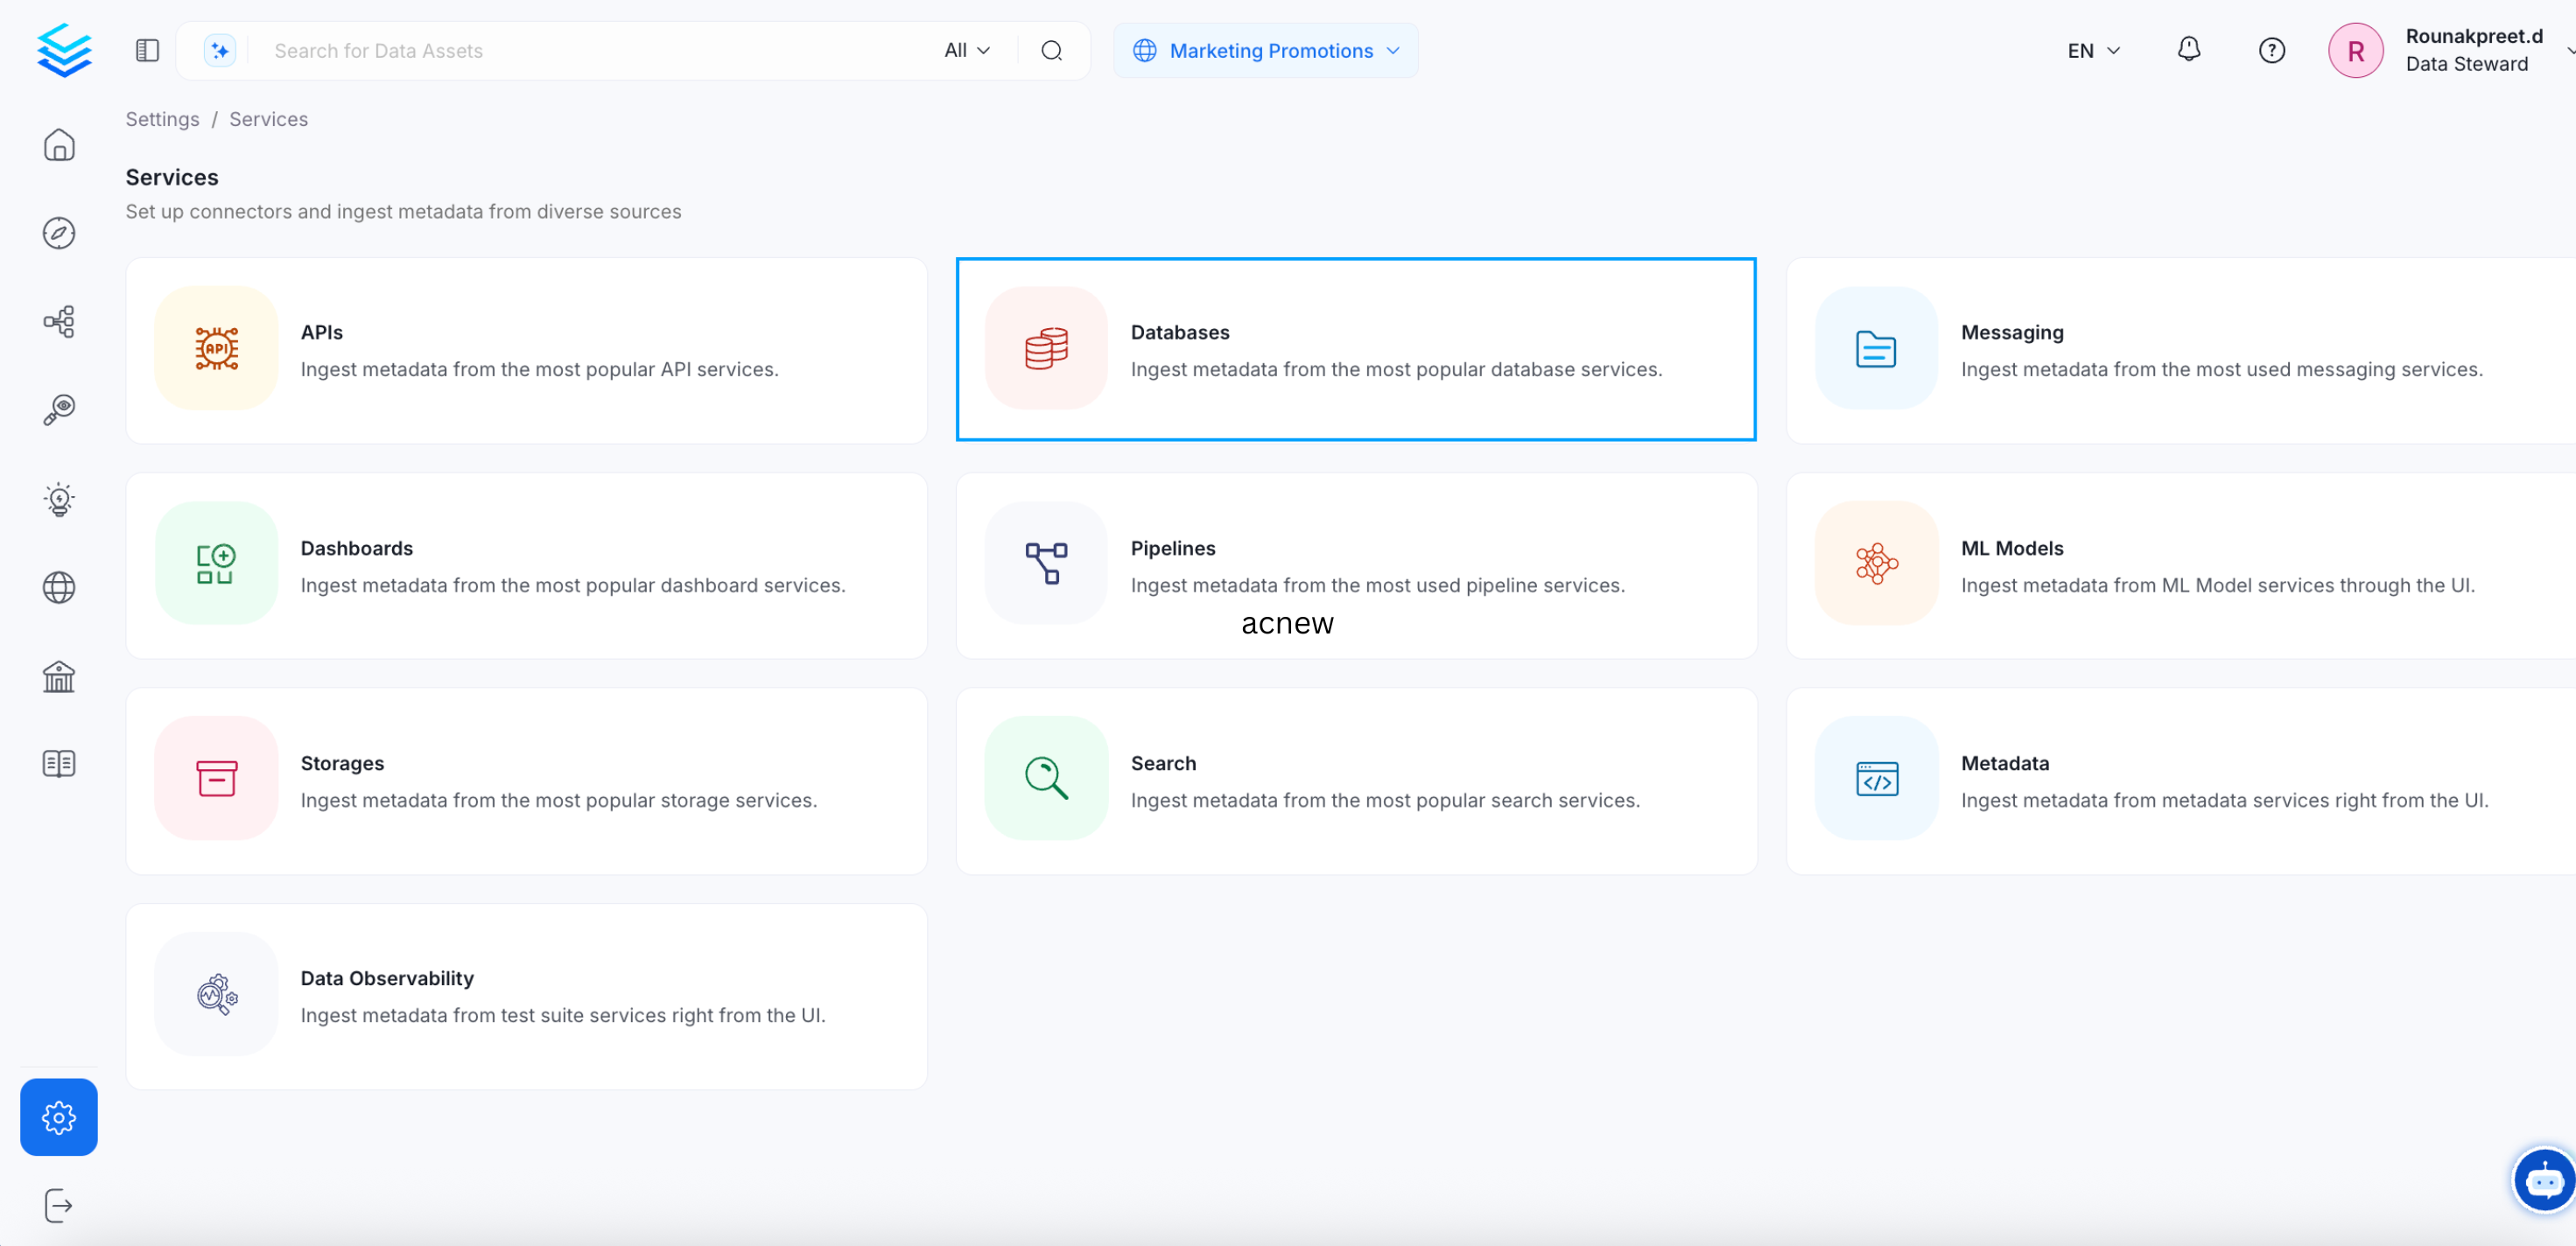
Create a Service Connection
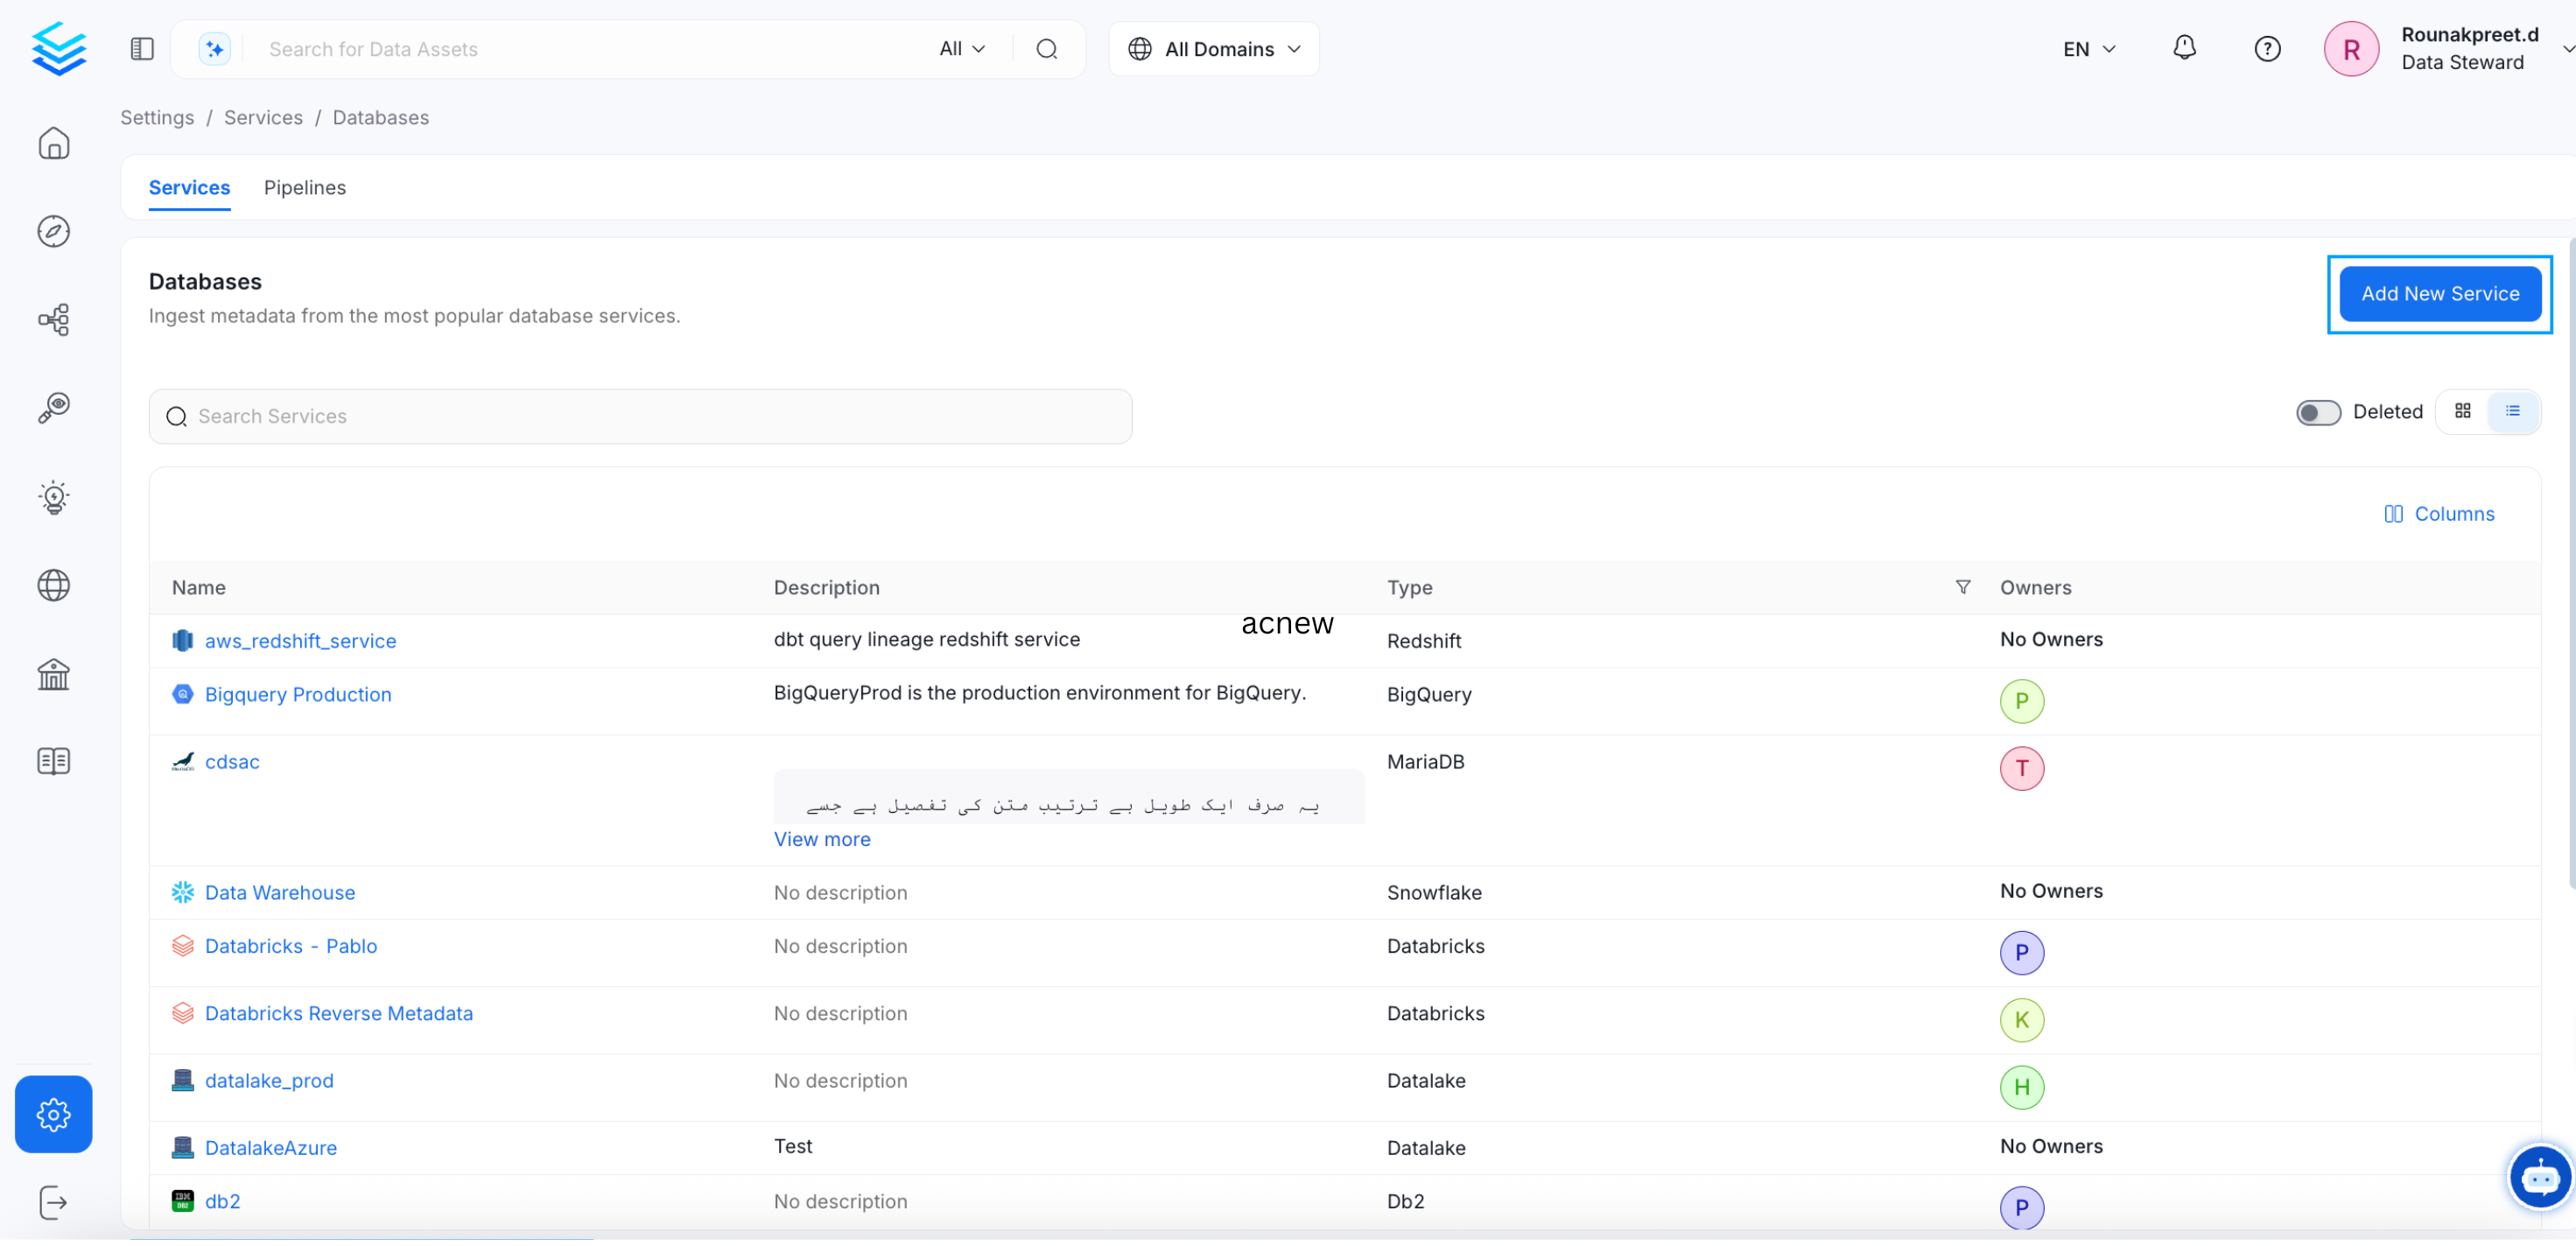
Create a Service Connection
- Select the Database service of your choice. For example, Snowflake. Click Next.

Select the Database Connector
- To configure Snowflake, enter a unique service name. Click Next.
- Name: No spaces allowed. Apart from letters and numbers, you can use _ - . & ( )
- Description: It is optional, but best to add documentation to improve data culture.
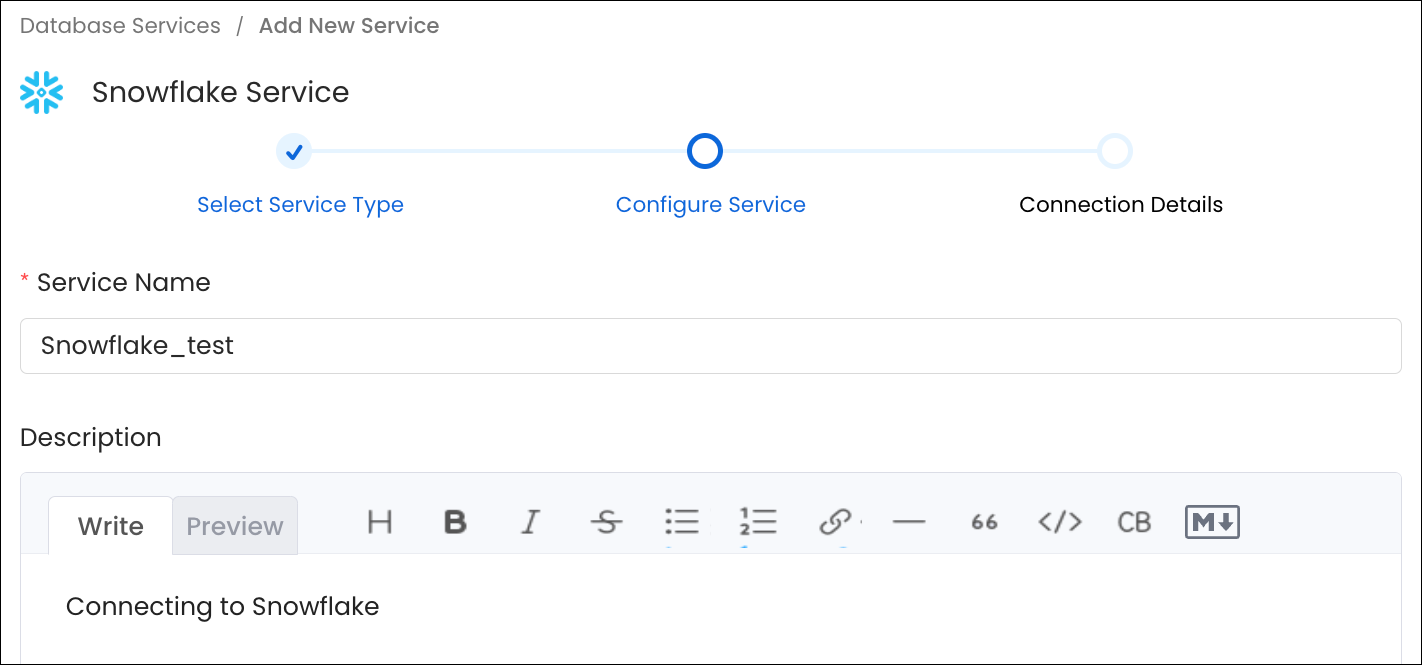
Configure Snowflake
- Enter the Connection Details. The Connector documentation is available right within OpenMetadata in the right side panel. The connector details will differ based on the service selected. Users can add their credentials to create a service and further set up the workflows.
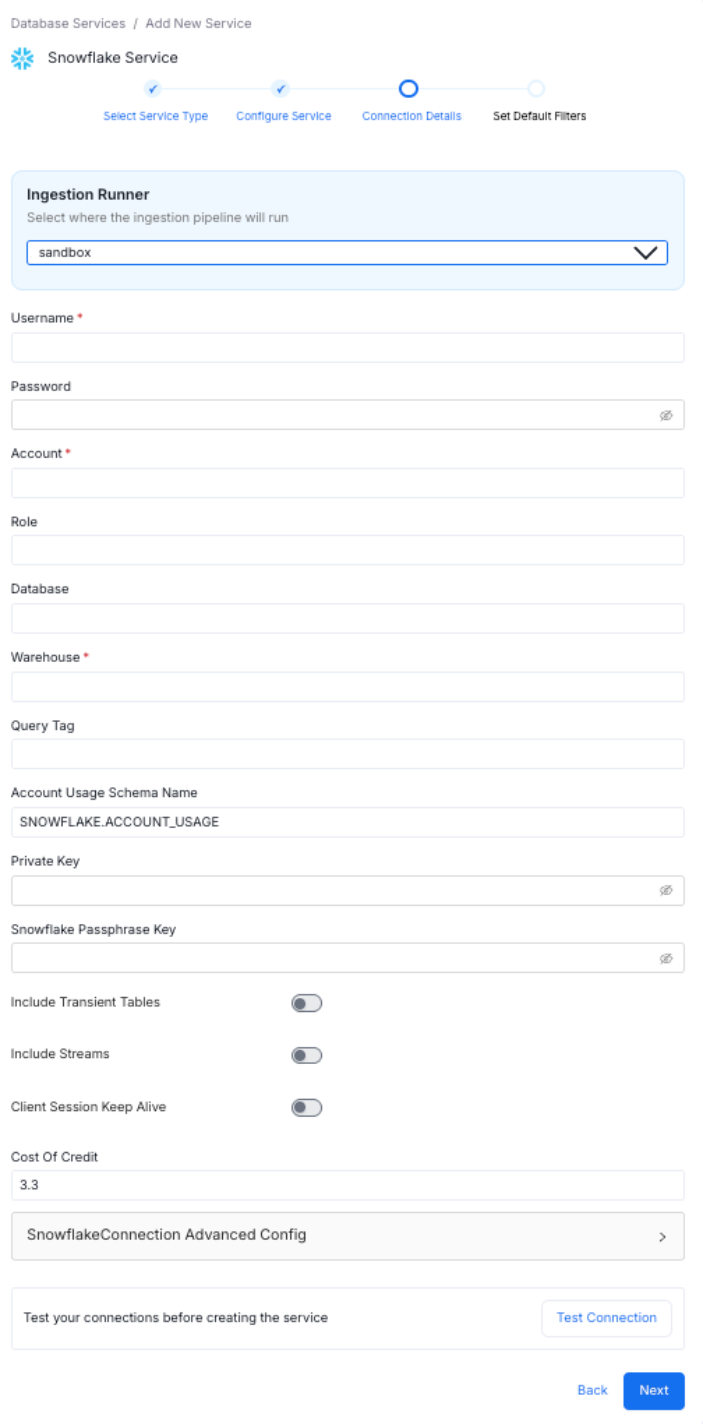
Connection Details
- Users can Test the Connection before creating the service. Test Connection checks for access, and also about what details can be ingested using the connection.

Test the Connection
- The Connection Status will verify access to the service as well as to the data assets. Once the connection has been tested, you can save the details.
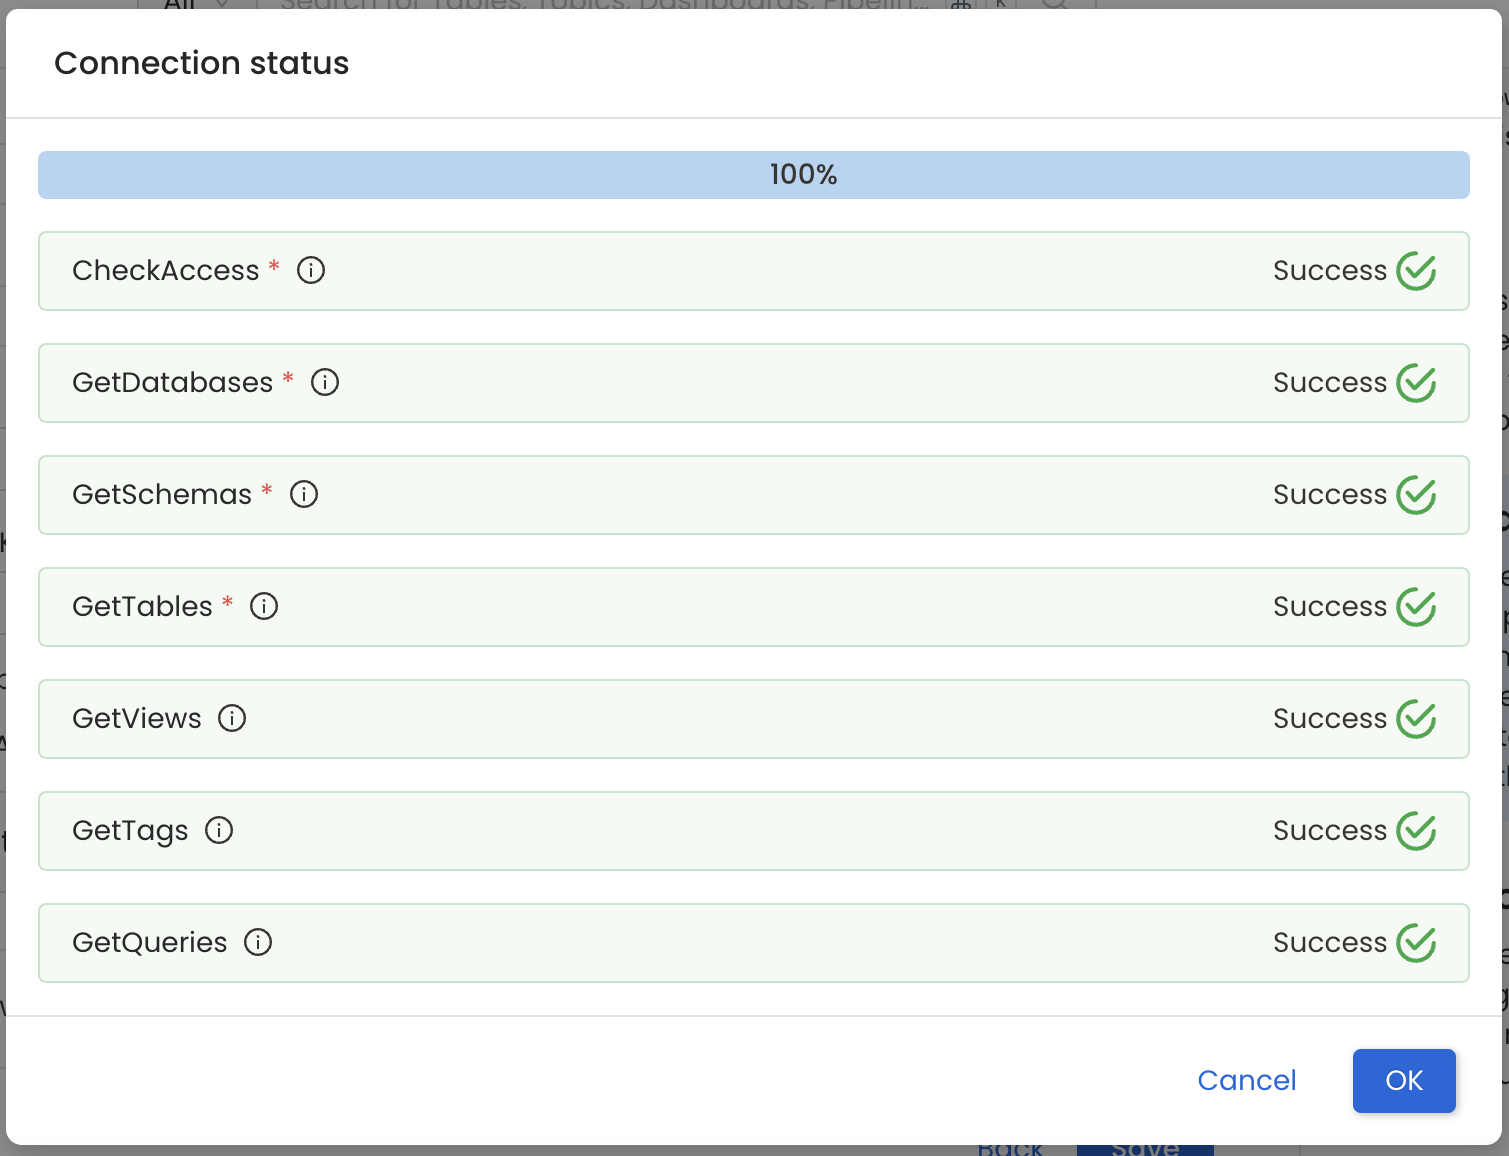
Connection Successful
- Add the default schema, database, and table patterns, then click Save to create and configure the database service. Administrators can subsequently set up pipelines to ingest source data into OpenMetadata.
Clicking on Save will navigate to the Database service page, where you can view the Insights, Databases, Agents, and Connection Details Tabs. You can also Add the Metadata Agent from the Agents tab.
Or, you can directly start with Adding Agent.
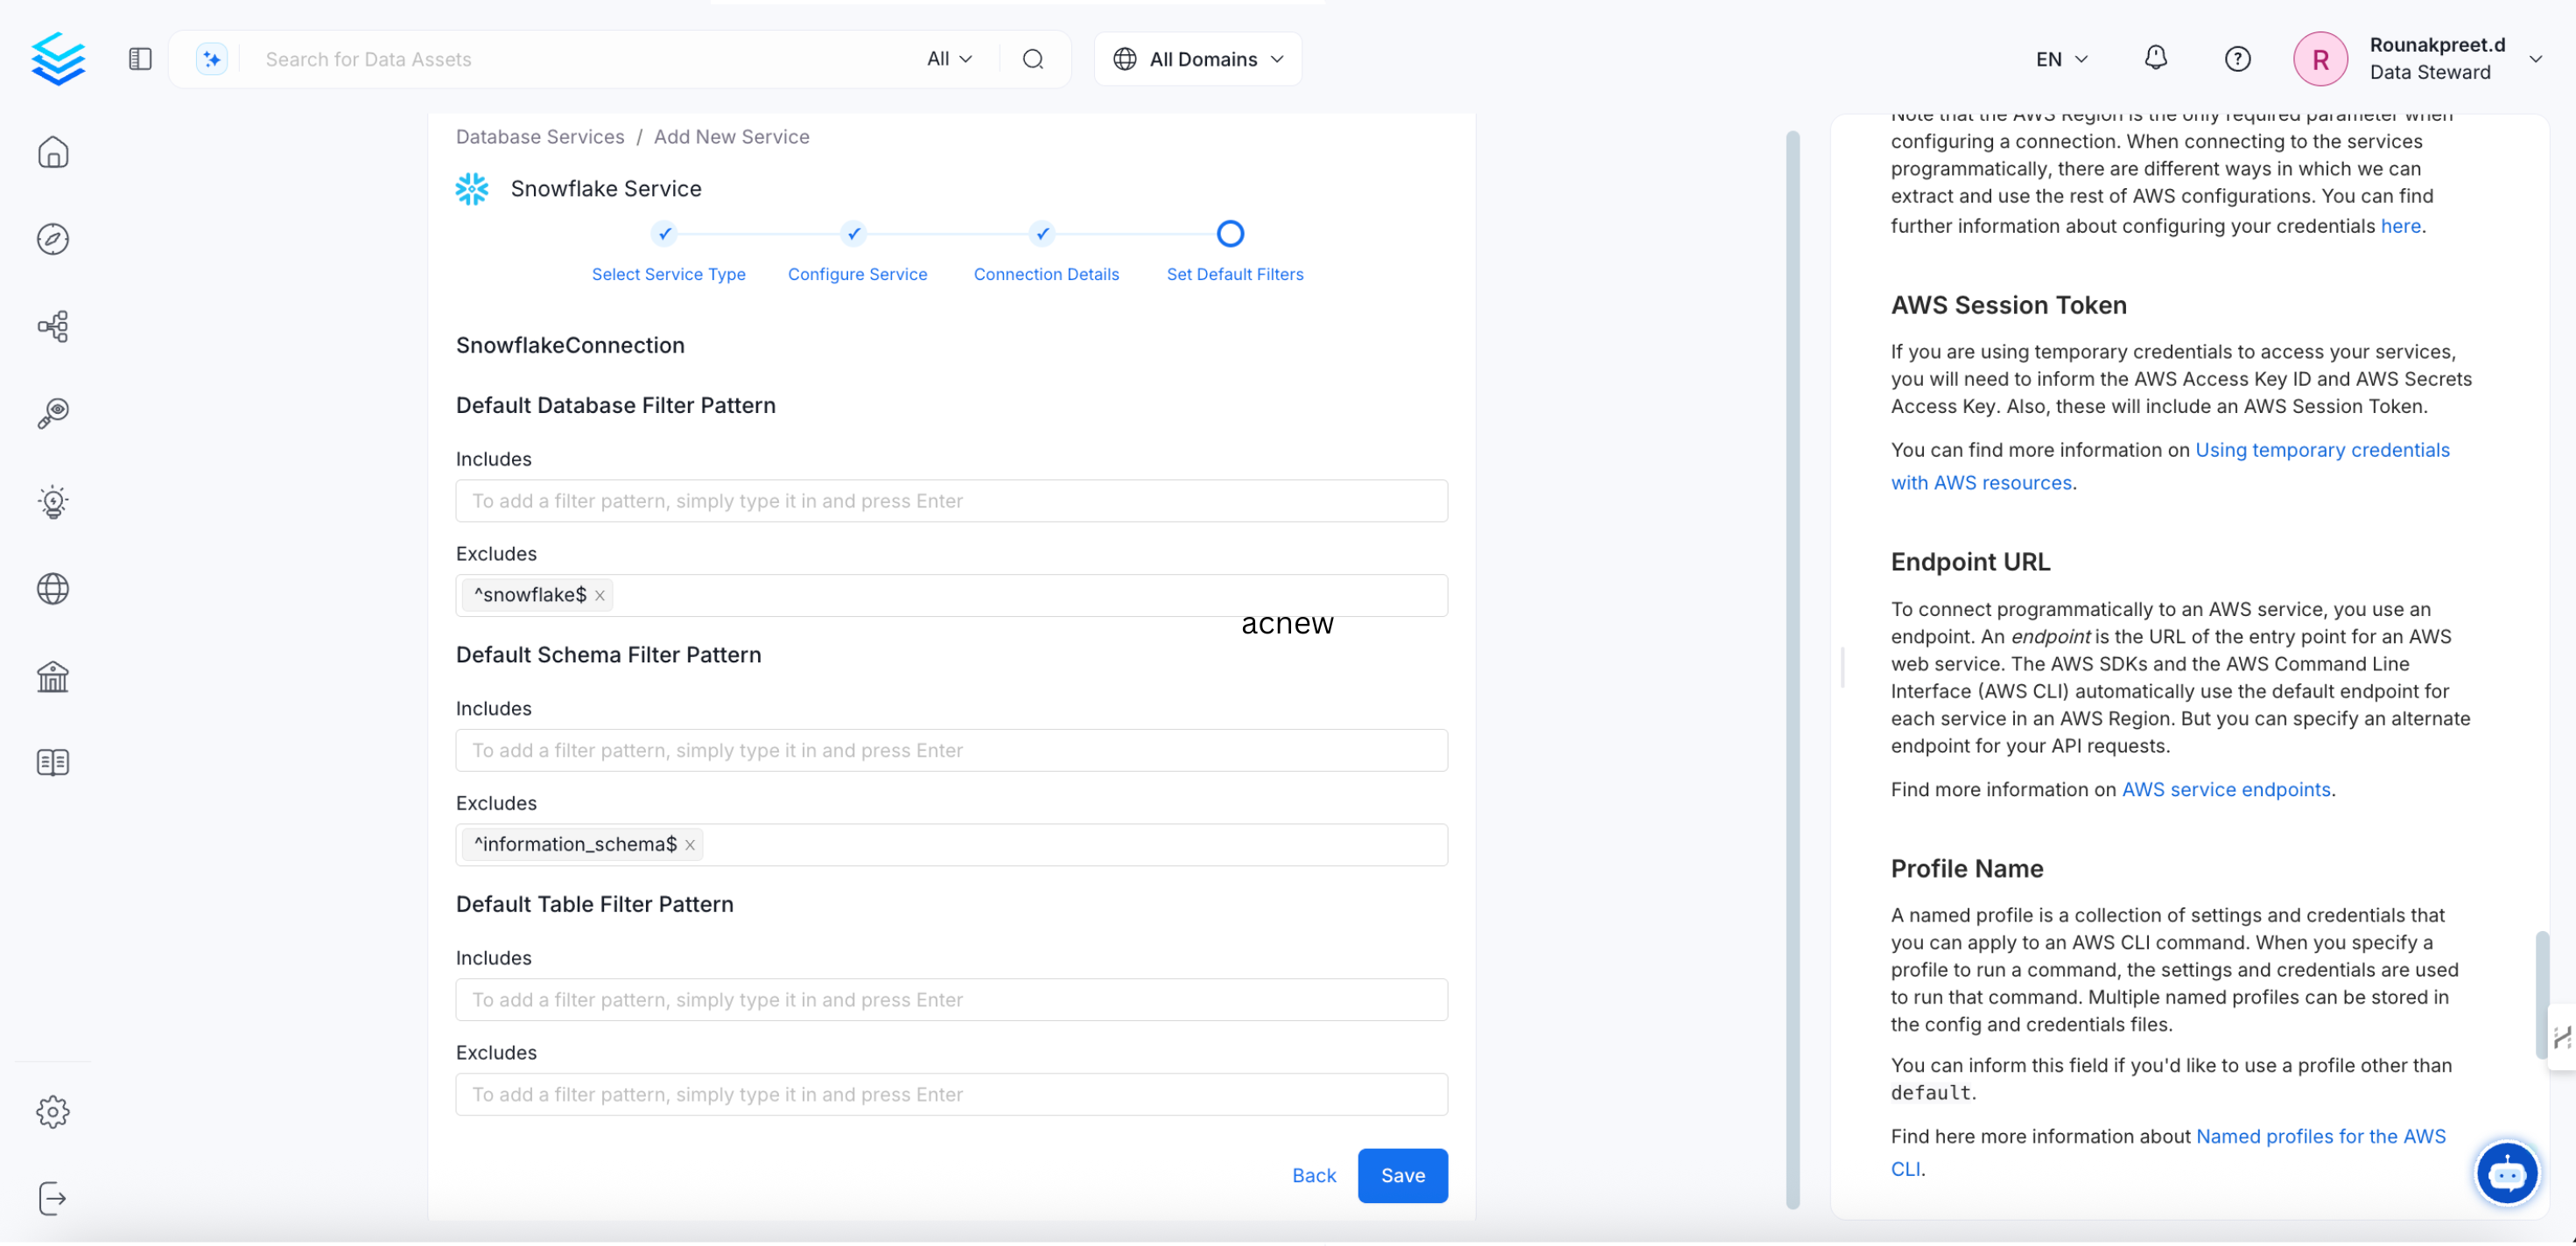
Snowflake Service Created
Tip: In the Service page, the Connection Tab provides information on the connection details as well as details on what data can be ingested from the source using this connection.
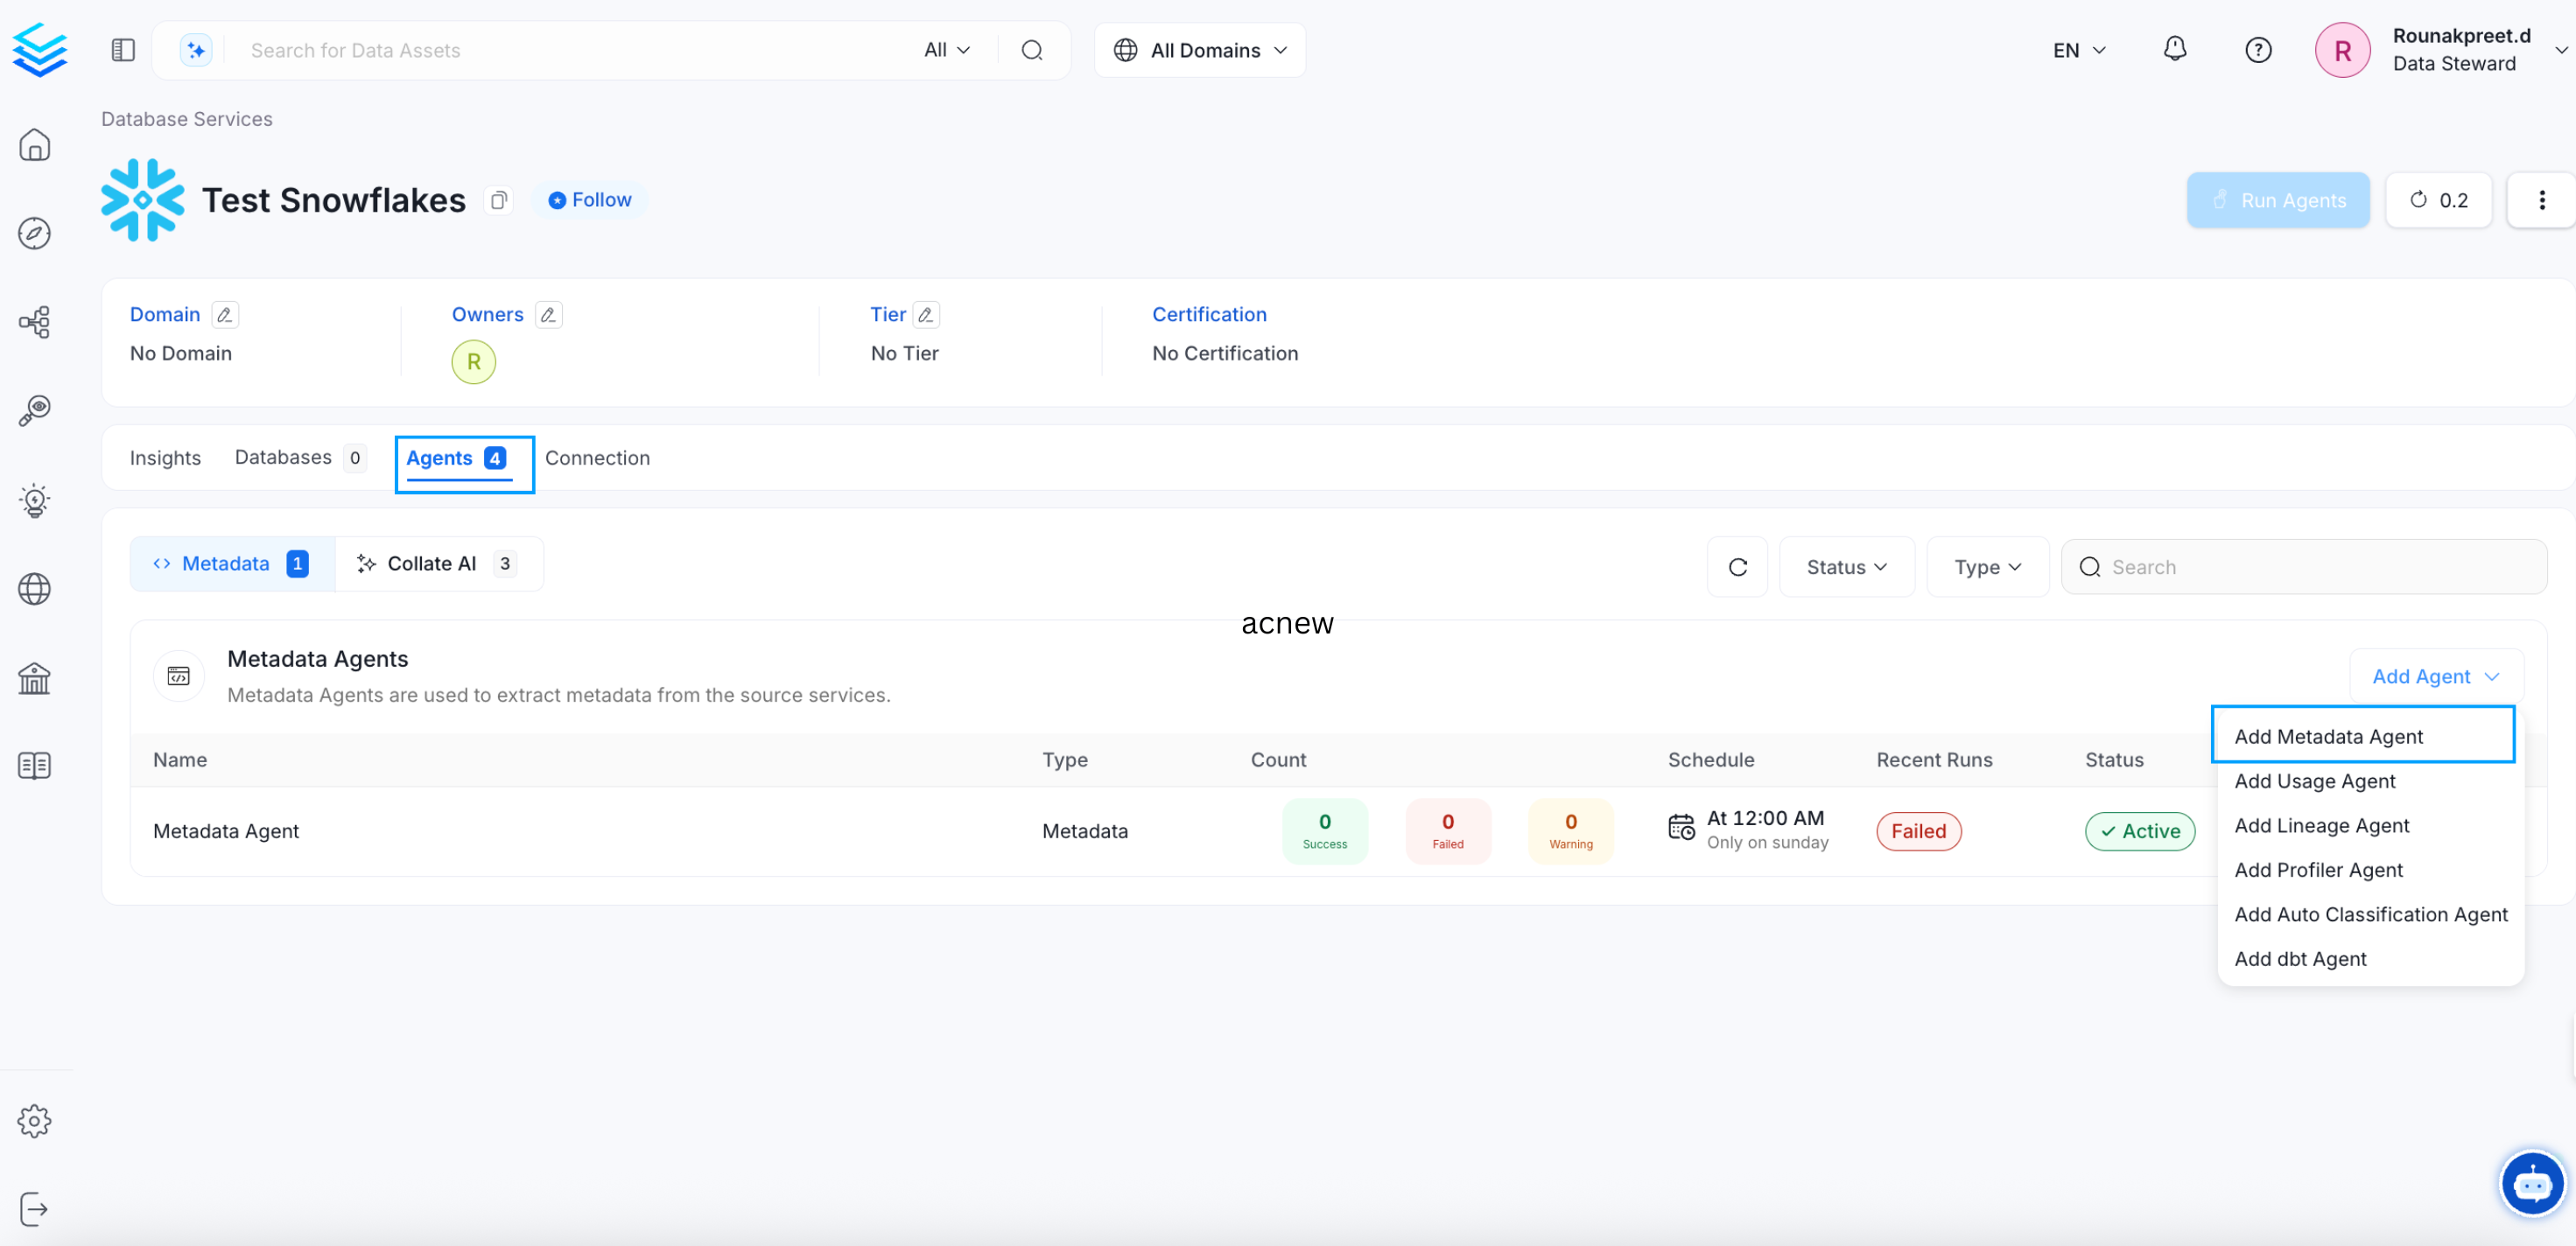
View Snowflake Service
- Click on Add Agent and enter the details to ingest metadata:
- Name: The name is randomly generated, and includes the Service Name, and a randomly generated text to create a unique name.
- Database Filter Pattern: to include or exclude certain databases. A database service has multiple databases, of which you can selectively ingest the required databases.
- Schema Filter Pattern: to include or exclude certain schemas. A database can have multiple schemas, of which you can selectively ingest the required schemas.
- Table Filter Pattern: Use the toggle options to:
- Use FQN for Filtering
- Include Views - to generate lineage
- Include Tags
- Enable Debug Log: We recommend enabling the debug log.
- Mark Deleted Tables
- View Definition Parsing Timeout Limit: The default is set to 300.
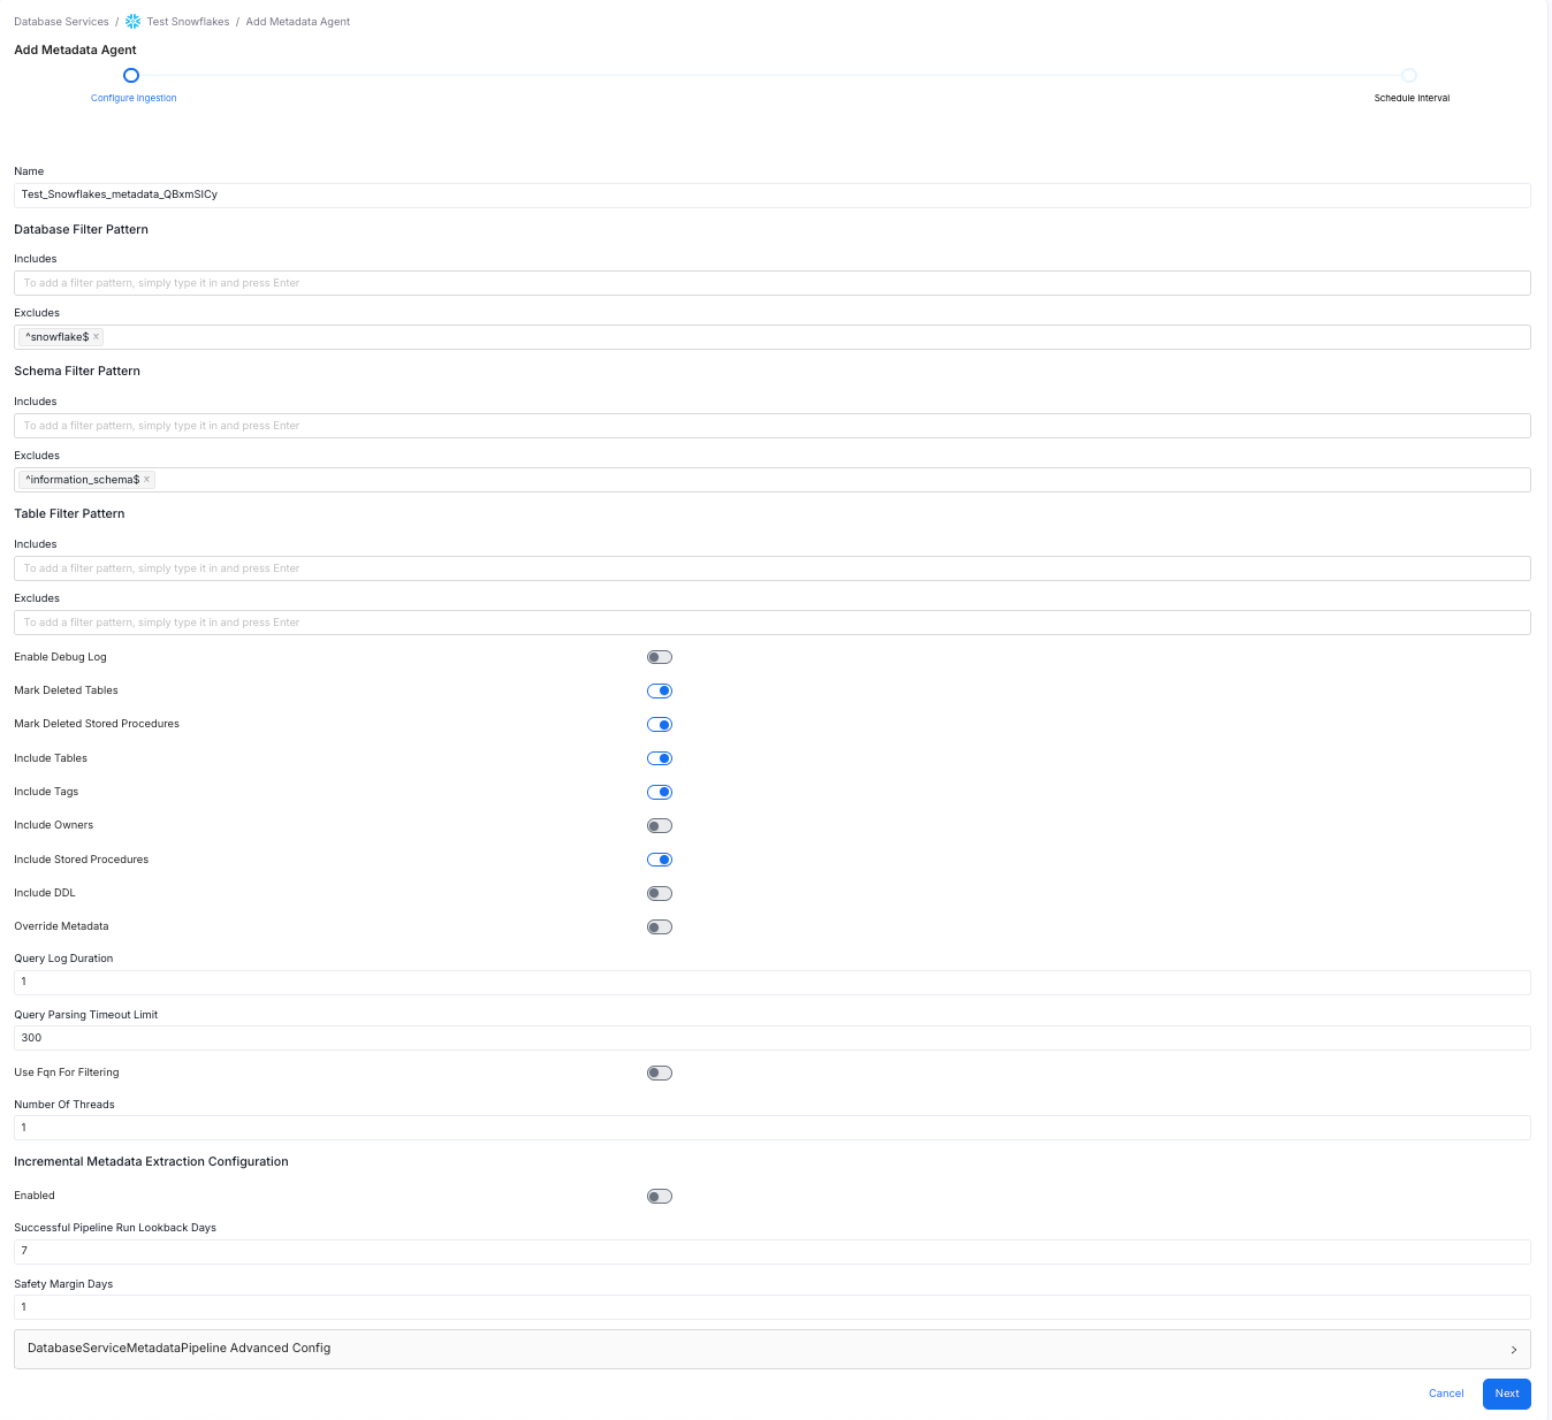
Configure Metadata Agent
- Schedule Metadata Agent - Define when the metadata Agent pipeline must run on a regular basis. Users can also use a Custom Cron expression.

Schedule and Deploy Metadata Agent
After the pipeline has been created and deployed successfully, click on View Service. The Agents Tab will provide all the details for the recent runs, like if the pipeline is queued, running, failed, or successful. On hovering over the Agent details, admin users can view the scheduling frequency, as well as the start and end times for the recent runs. Users can perform certain actions, like:
- Run the pipeline now.
- Kill to end all the currently running pipelines.
- Redeploy: When a service connection is setup, it fetches the data as per the access provided. If the connection credentials are changed at a later point in time, redeploying will fetch additional data with updated access, if any.

View Service Agent
By connecting to a database service, you can ingest the databases, schemas, tables, and columns. In the Service page, the Databases Tab will display all the ingested databases. Users can further drilldown to view the Schemas, and Tables.
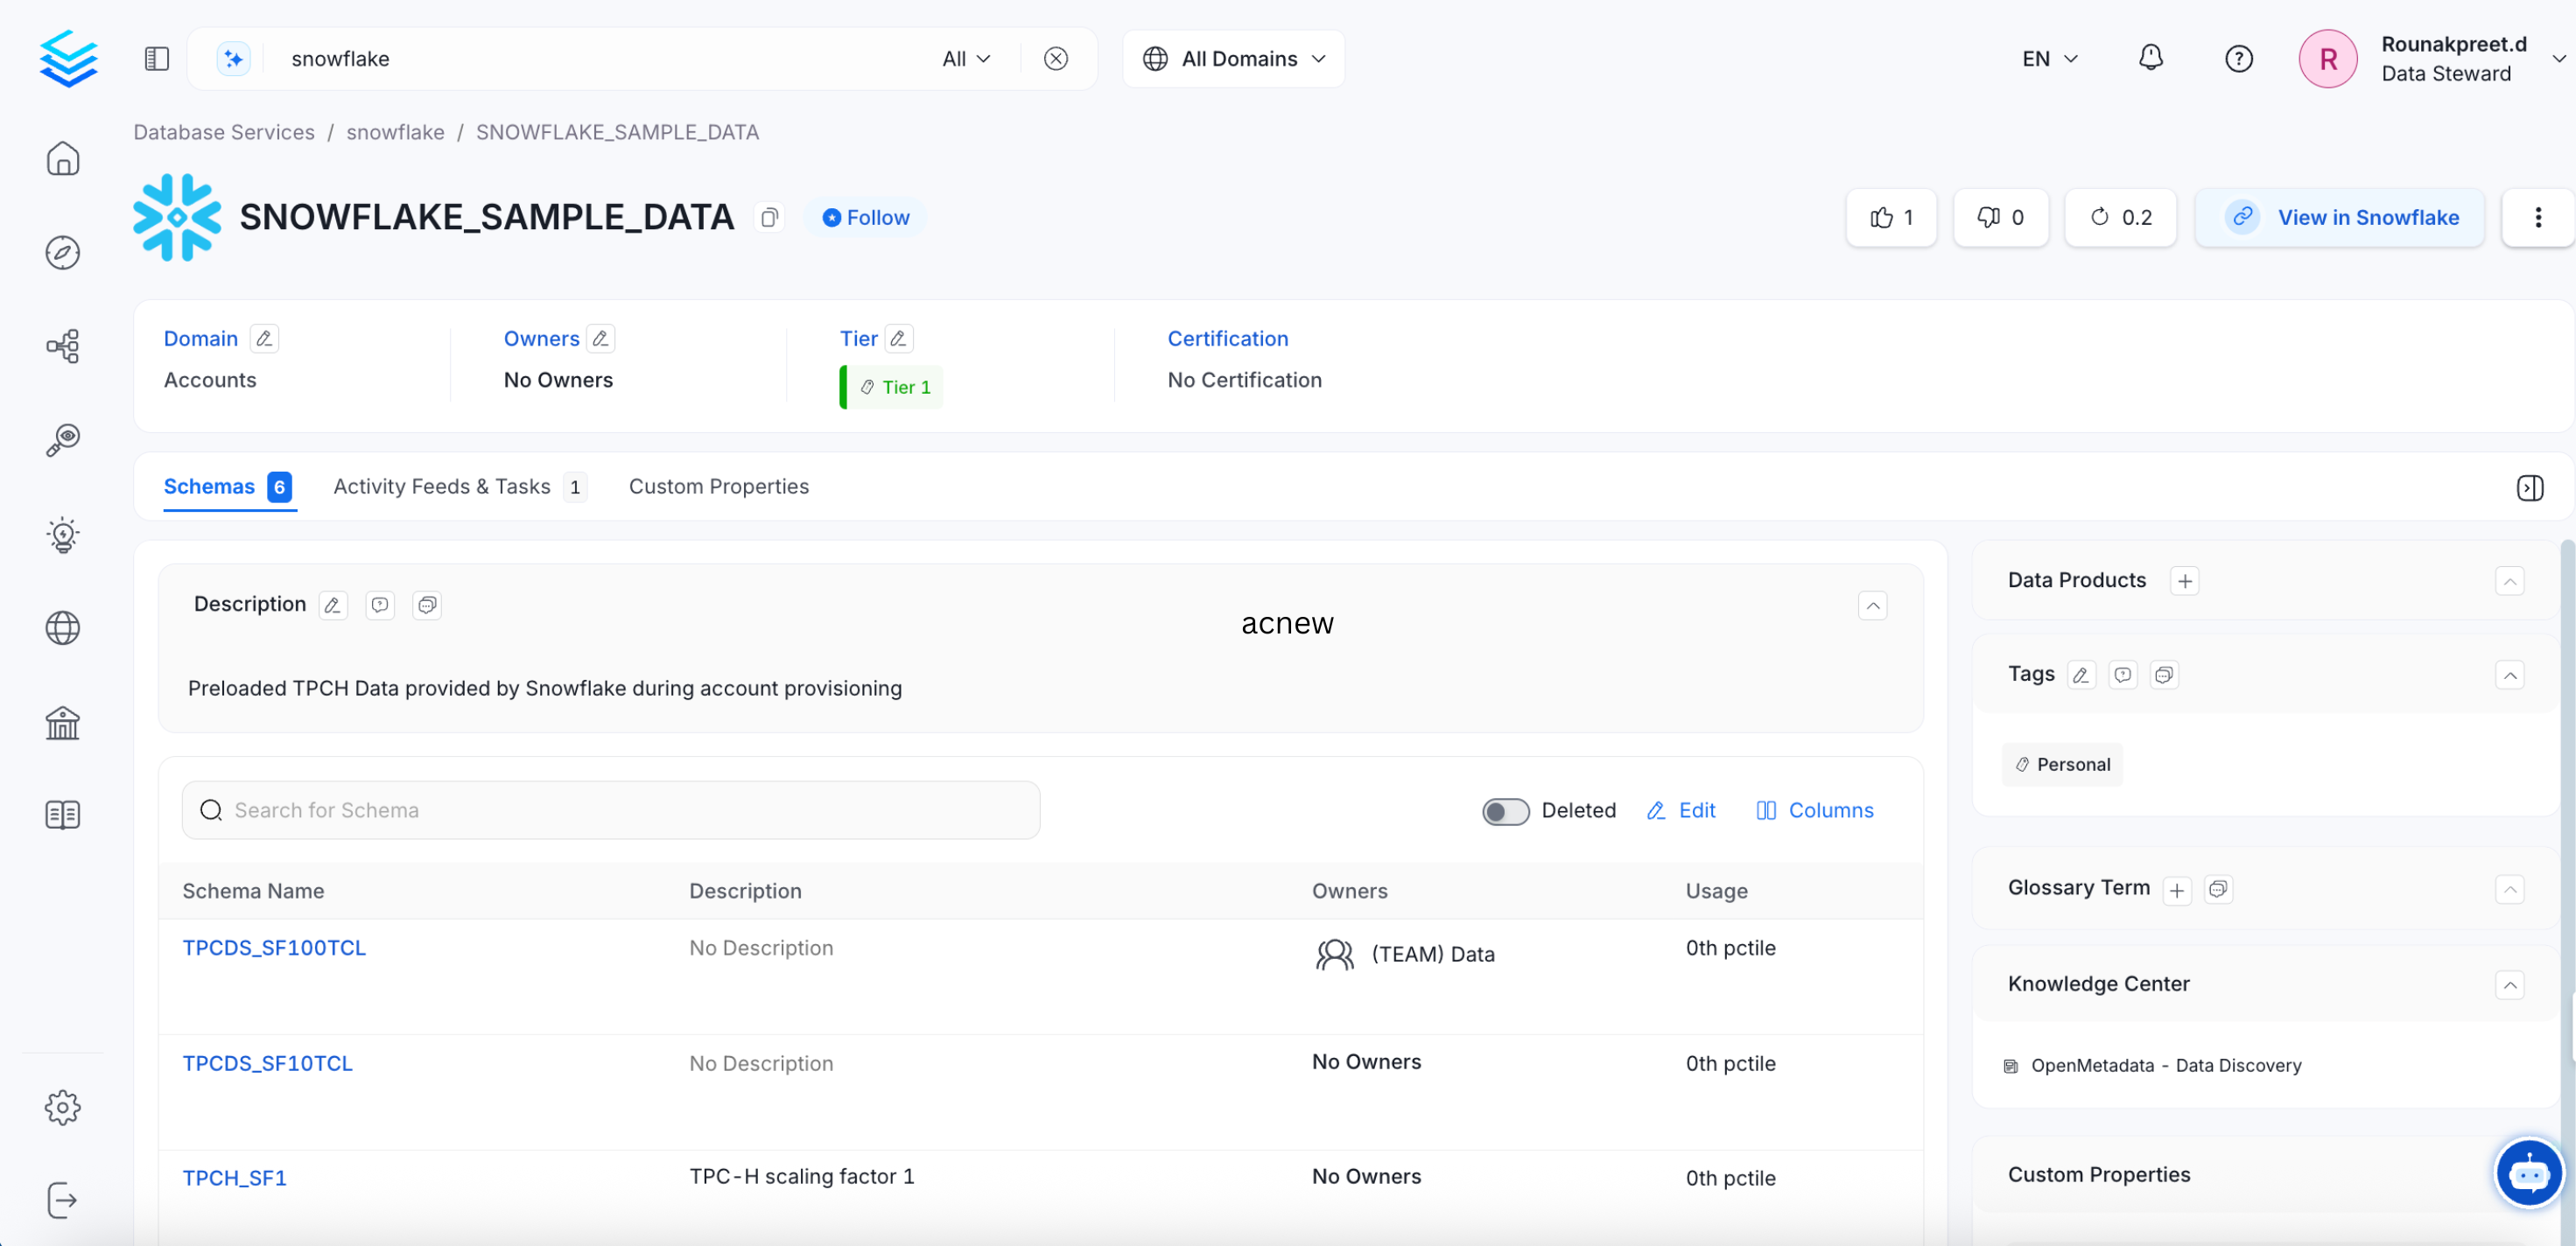
View Table Details
Note: Once you’ve run a metadata Agent pipeline, you can create separate pipelines to bring in Usage, Lineage, dbt, or to run Profiler. To add pipelines, select the required type of Agent and enter the required details.
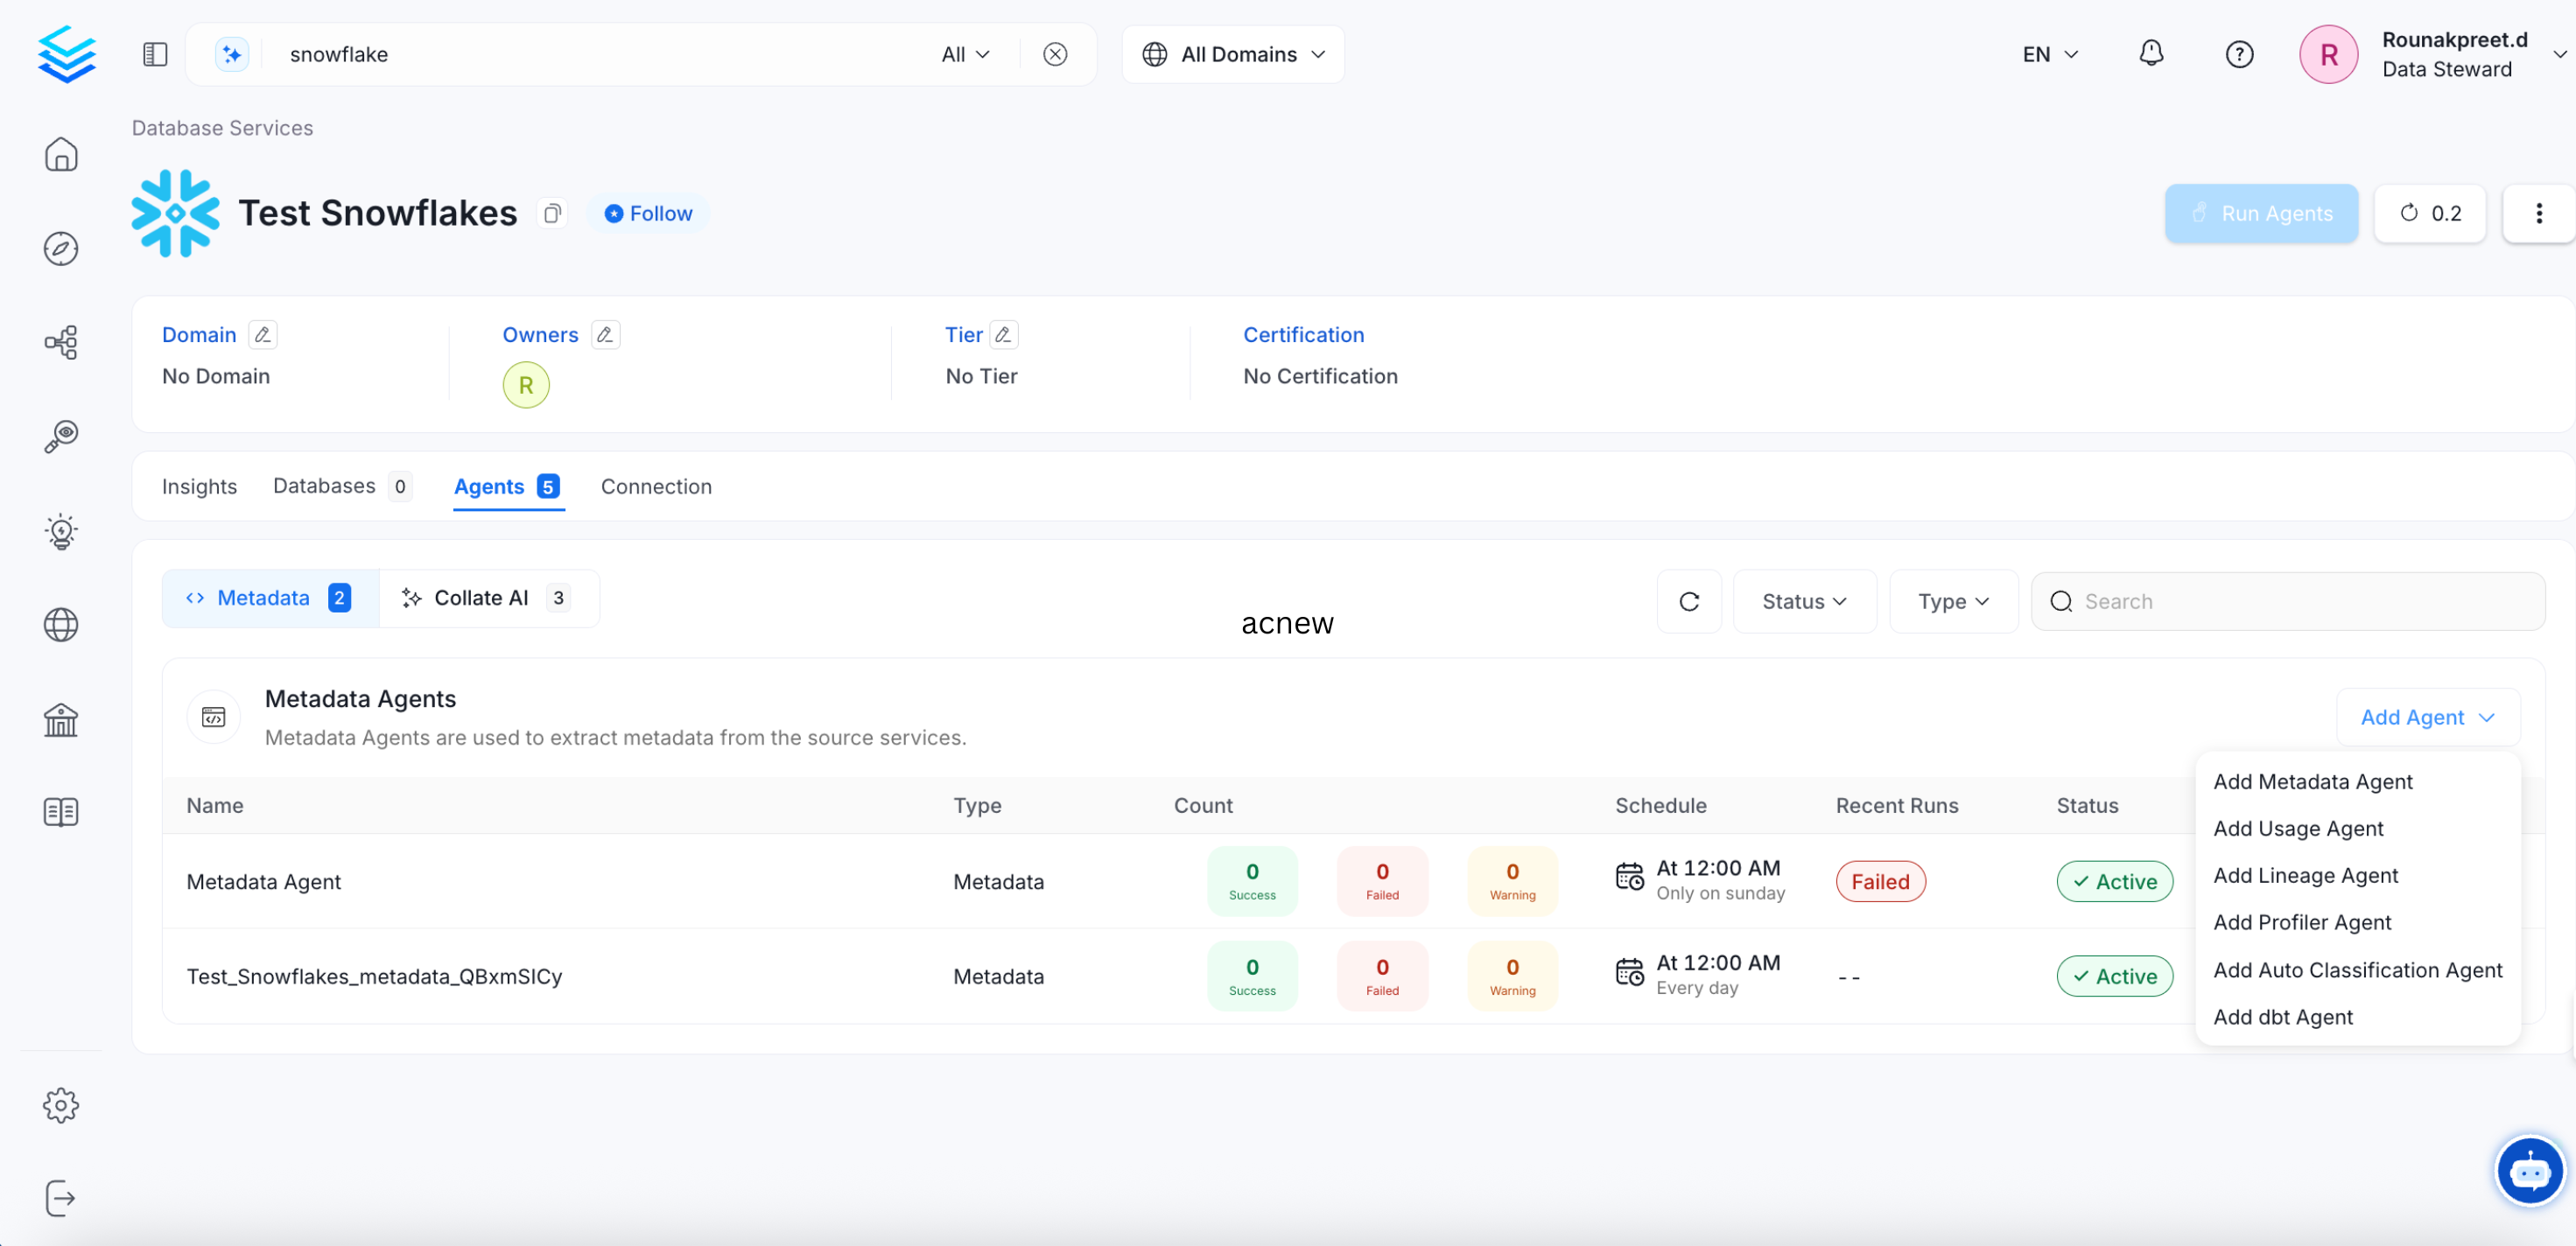
Add Agent Pipelines for Usage, Lineage, Profiler, and dbt
Admin users can create, edit, or delete services. They can also view the connection details for the existing services.
Pro Tip: Refer to the Best Practices for Metadata Agent.
Delete a Service ConnectionPermanently delete a service connection.